All patterns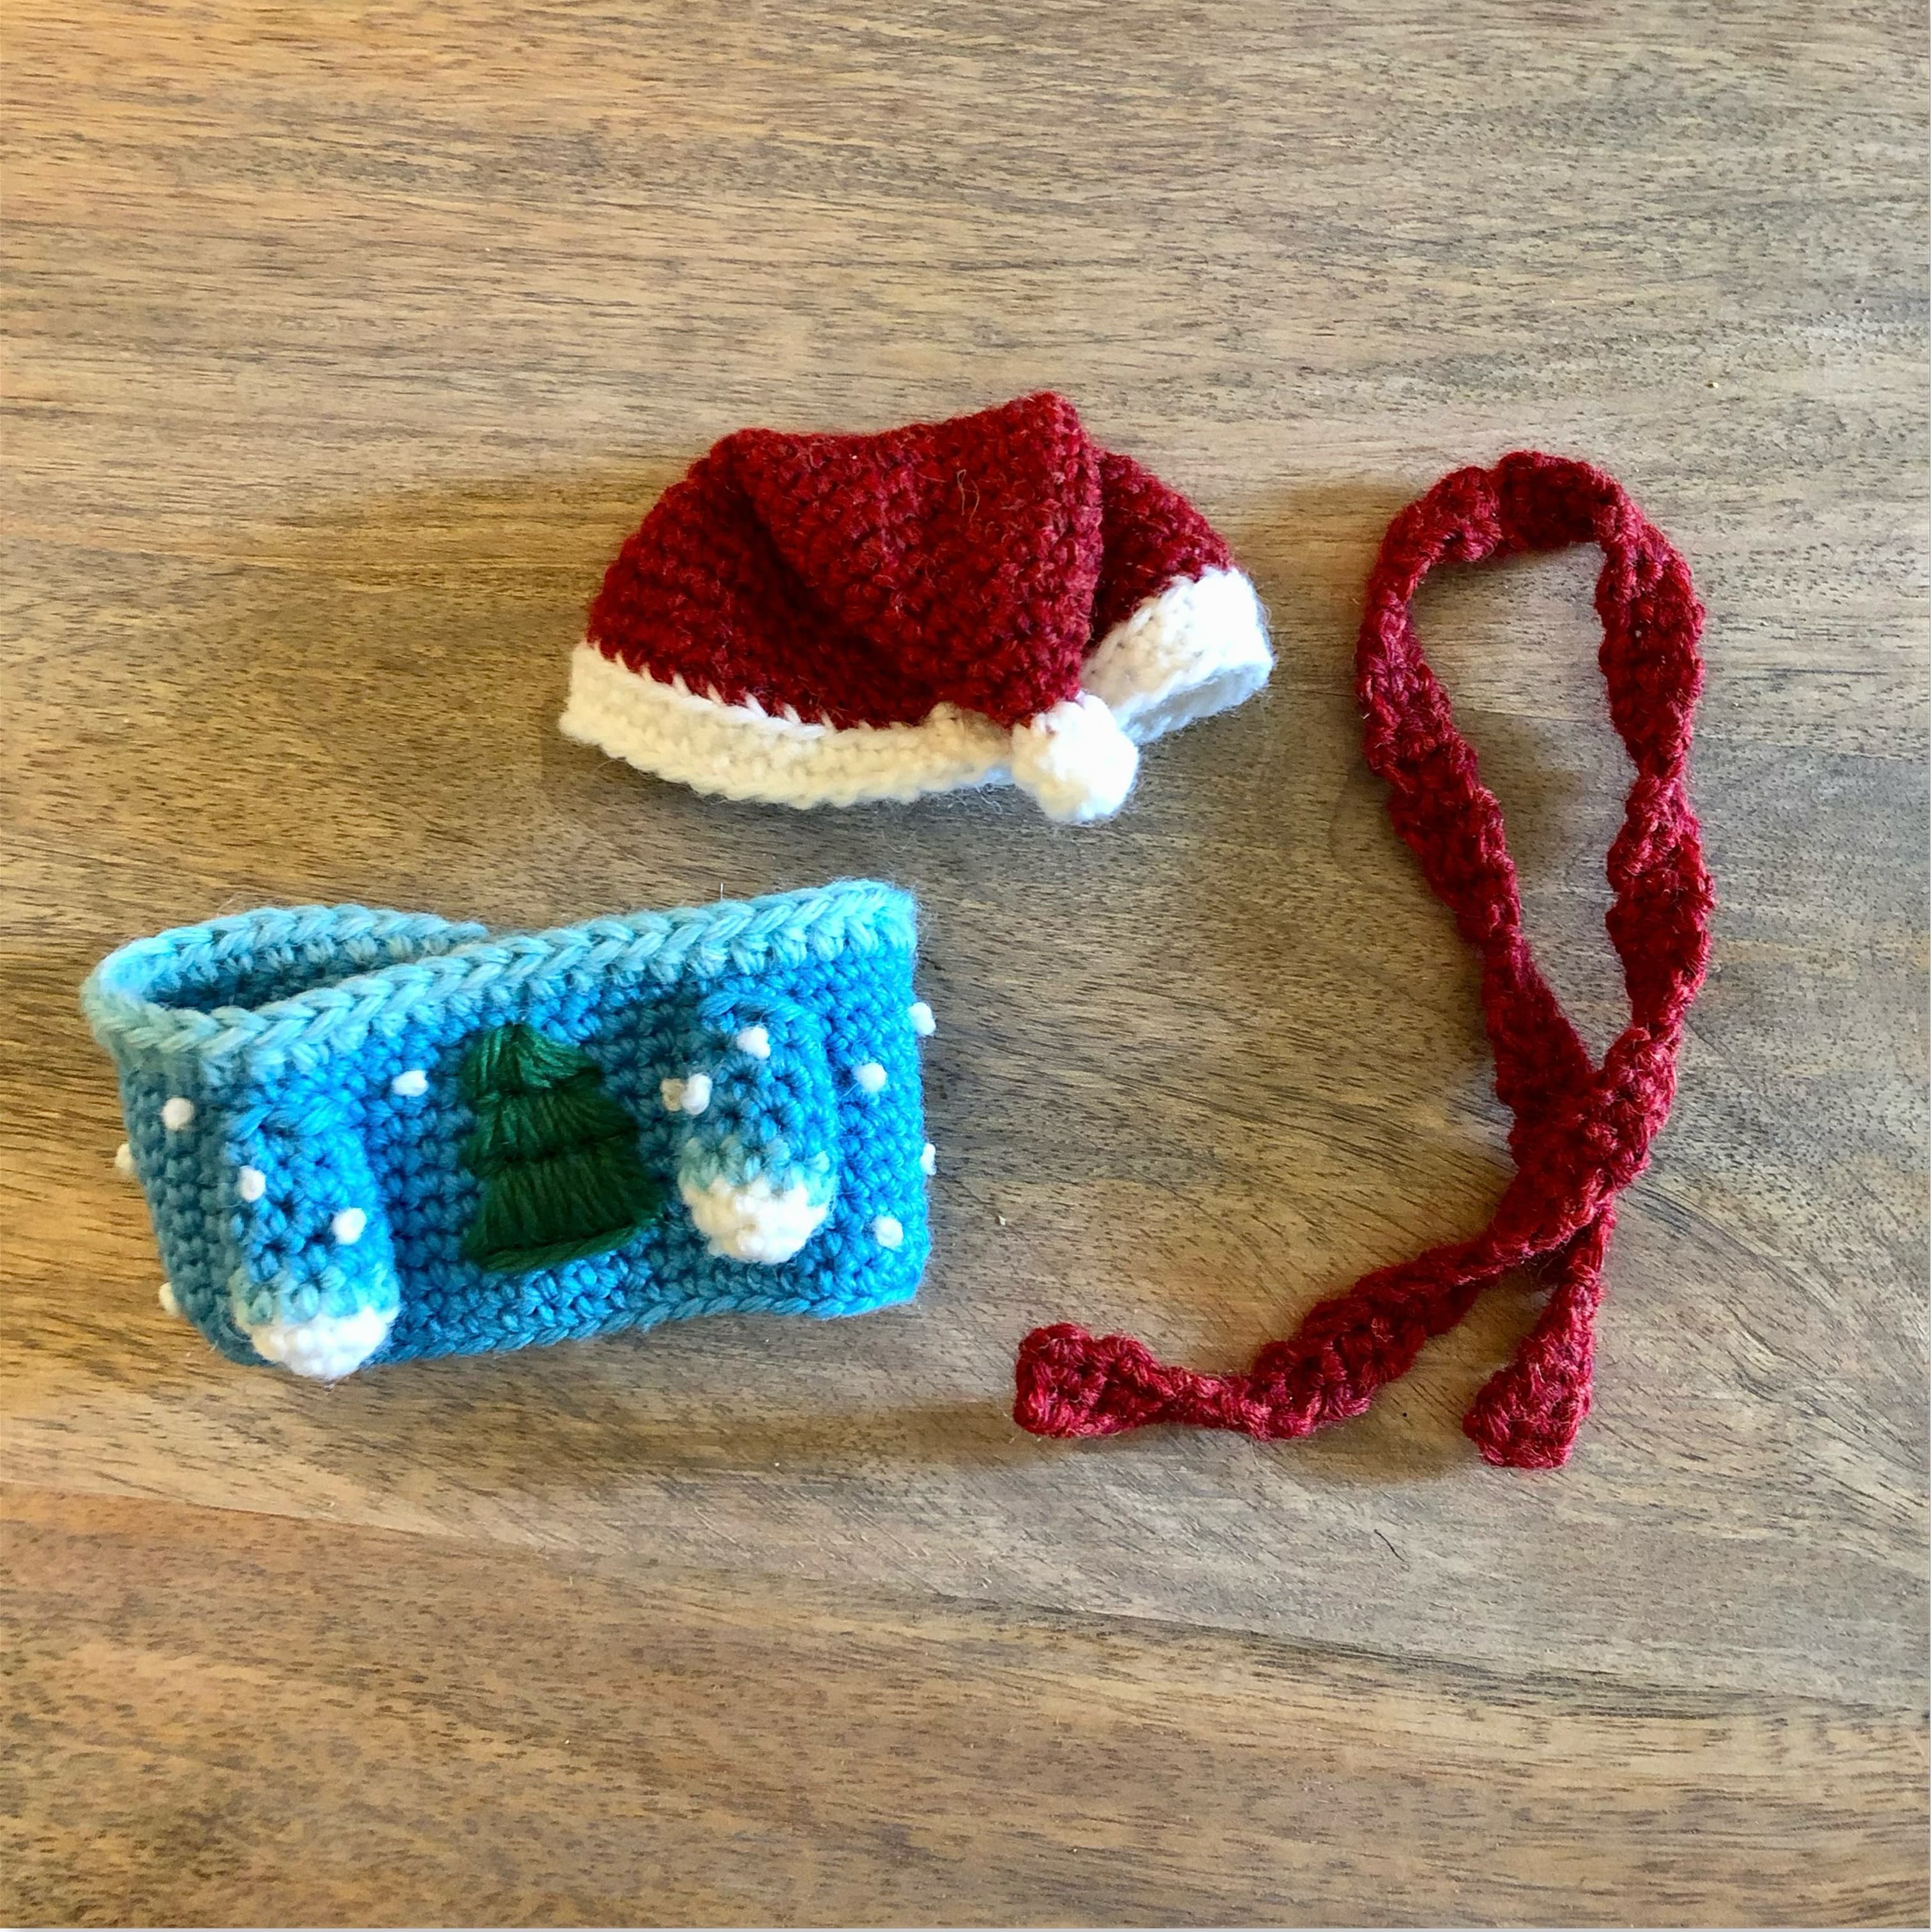

Accessories & Add-Ons
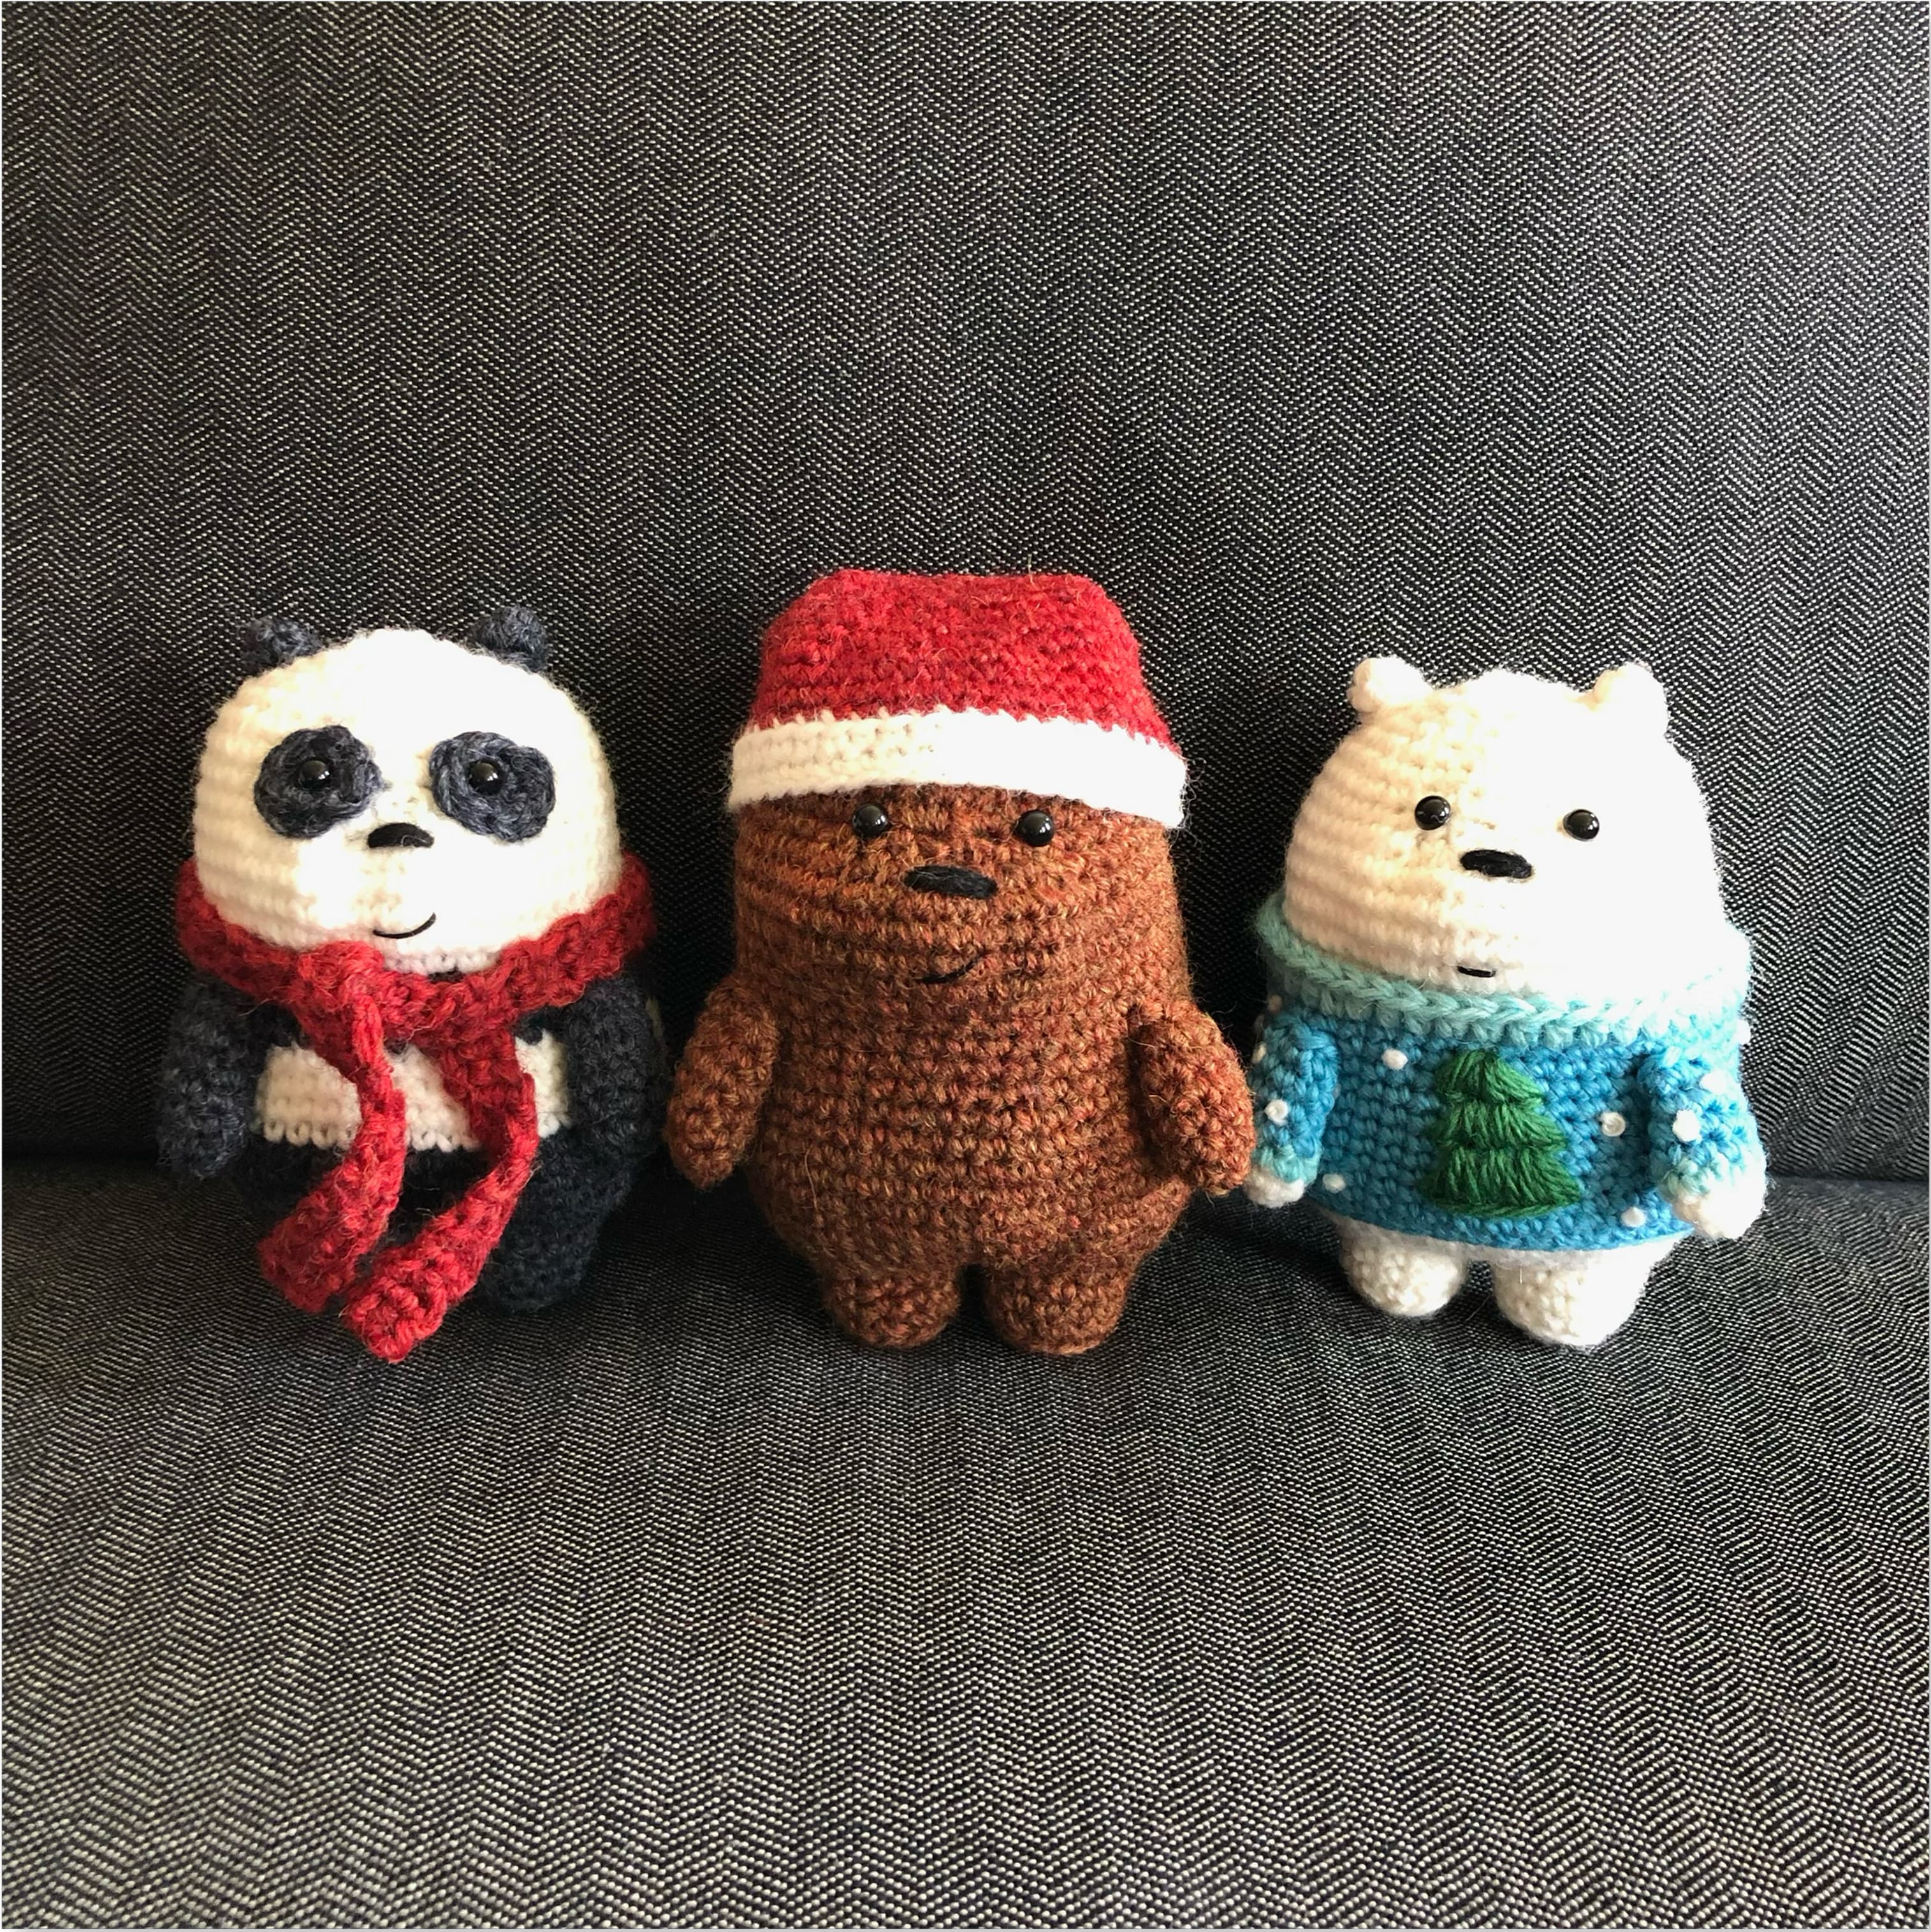
We Bare Bears — Christmas Accessories
Dress up your We Bare Bears amigurumi for the holidays. Includes a Santa hat, scarf, and sweater sized to fit the bears.
Companion to the We Bare Bears — Inspired Baby Bear pattern.
Beginner
Materials
White yarn
Shop on KnitPicks ↗Red yarn
Shop on KnitPicks ↗Light blue yarn
Shop on KnitPicks ↗Darker blue yarn
Shop on KnitPicks ↗Green yarn
Shop on KnitPicks ↗Crochet hook
The hook size should produce a tight stitch with your yarn. For my yarn, I used size E (3.5mm).
Tapestry needle
Shop on Amazon ↗Needle for making french knots
Shop on Amazon ↗
Abbreviations
Instructions
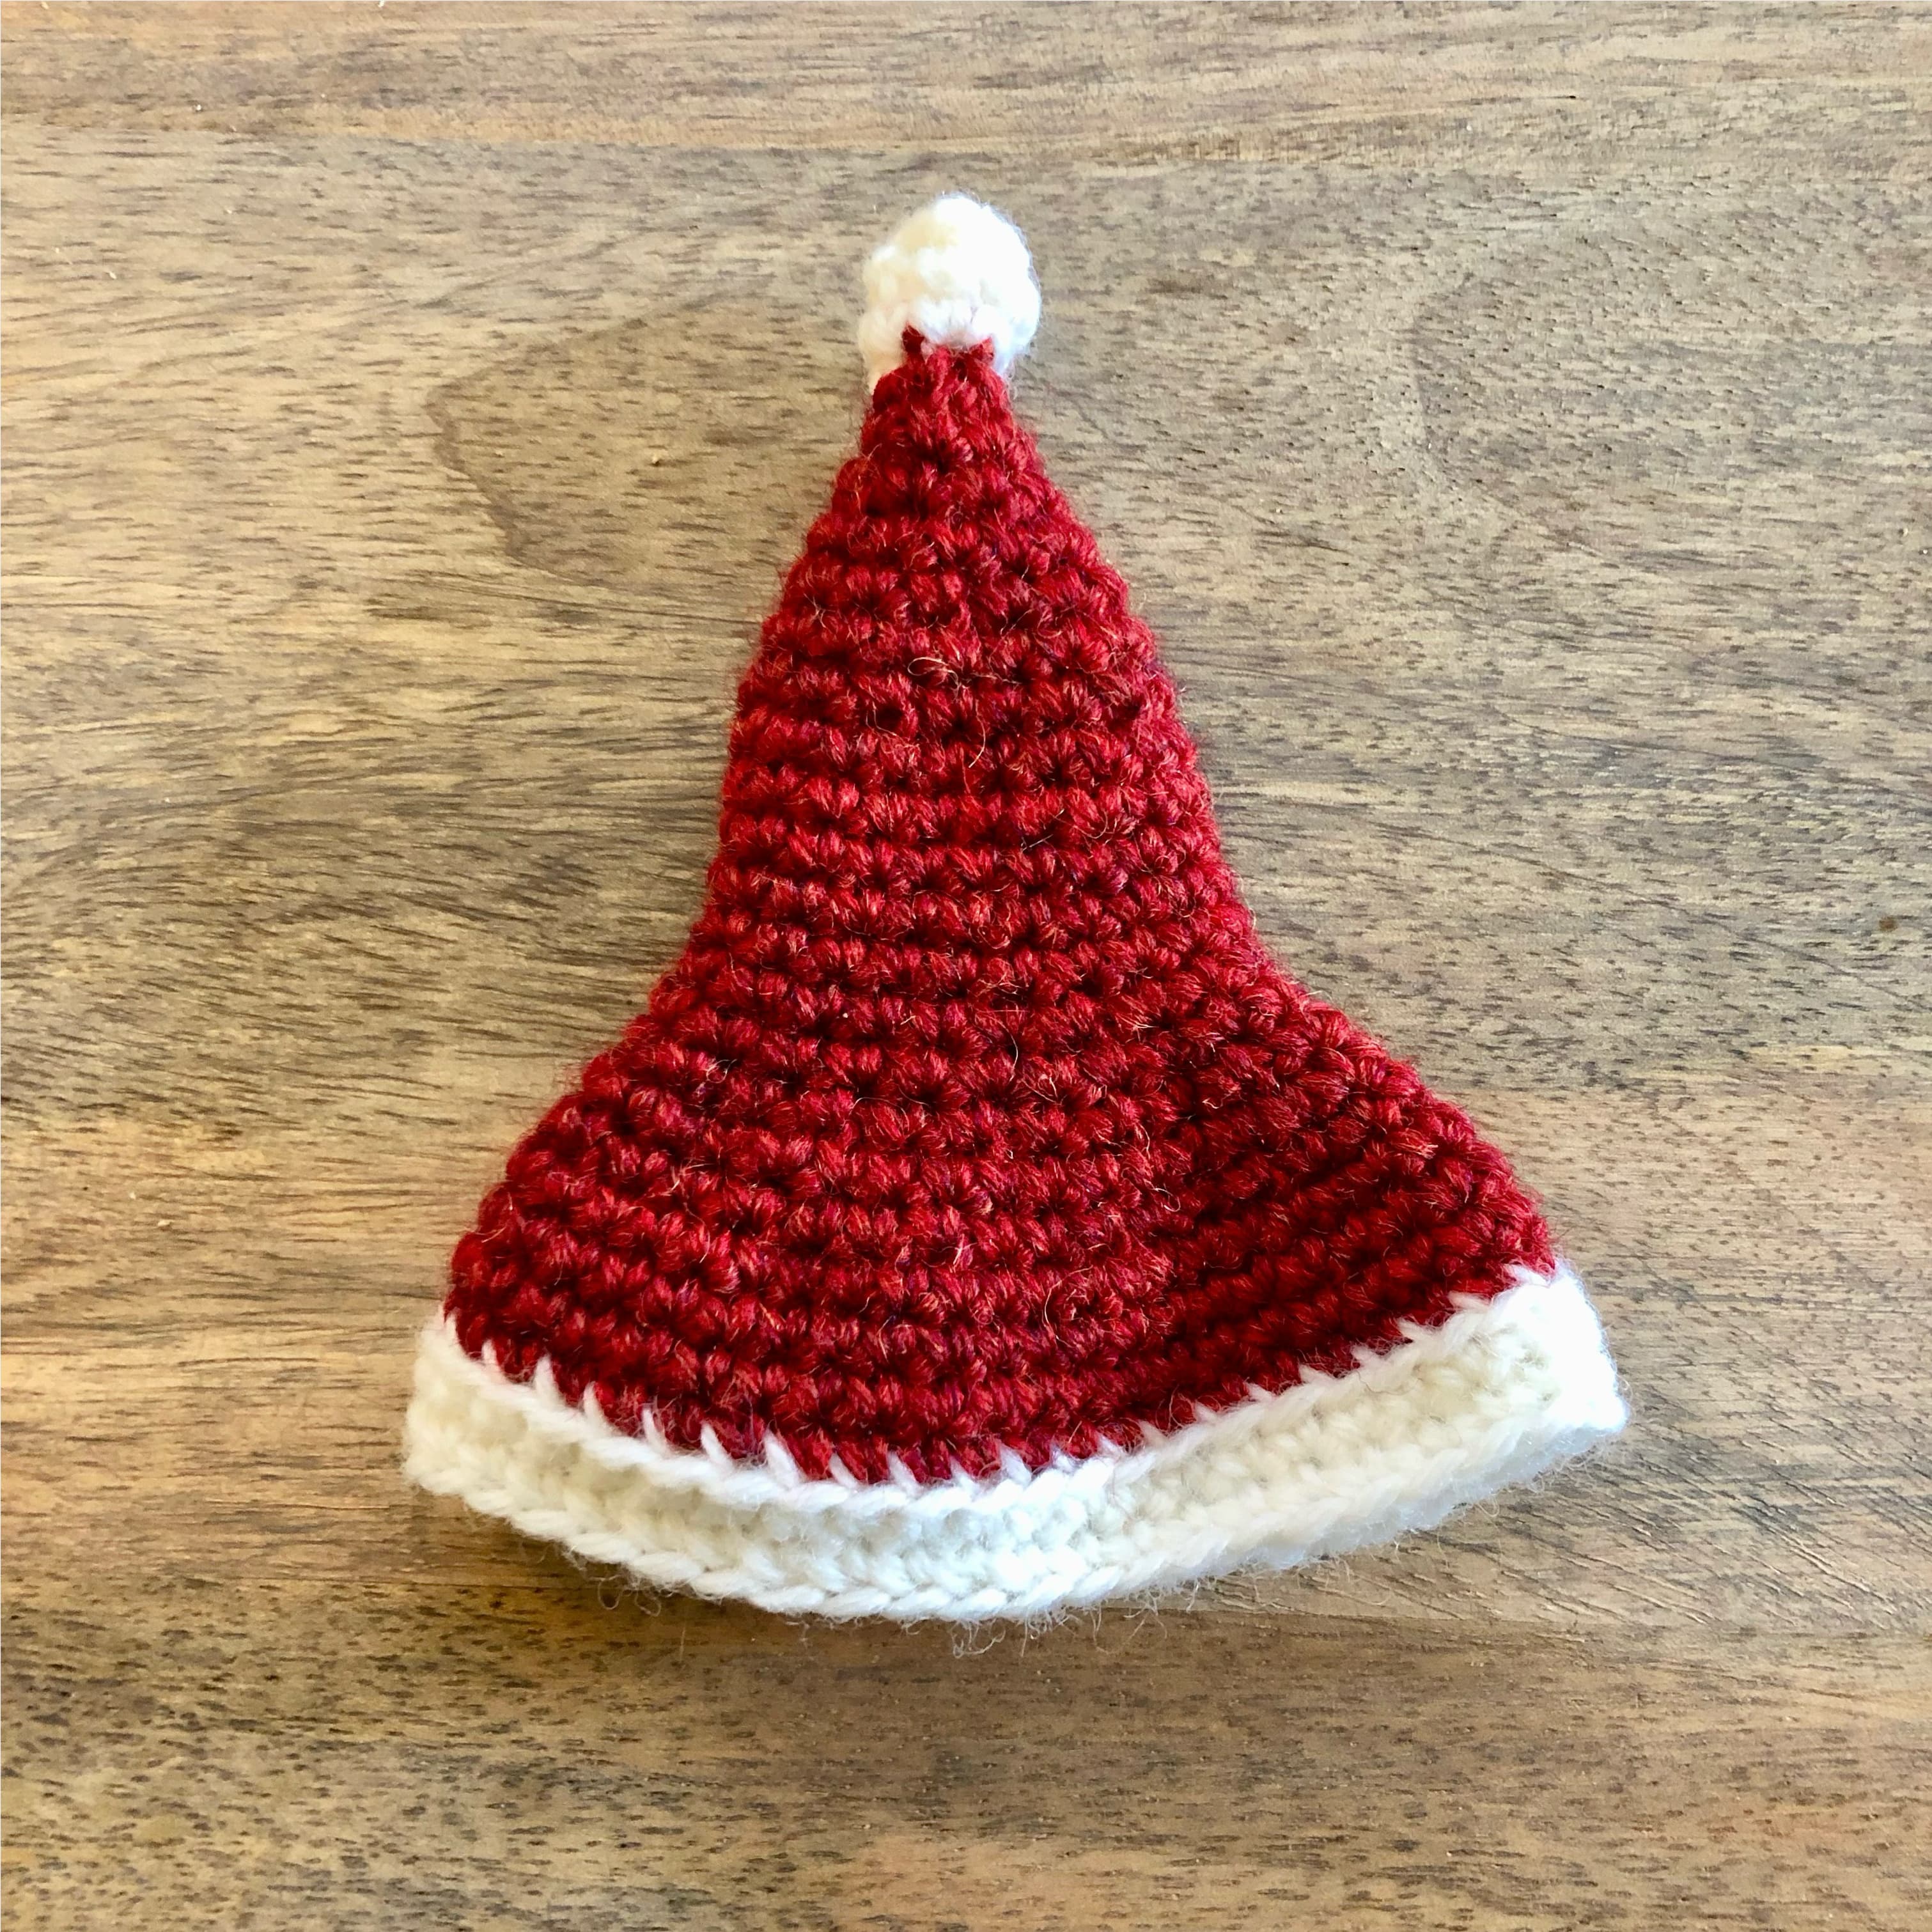
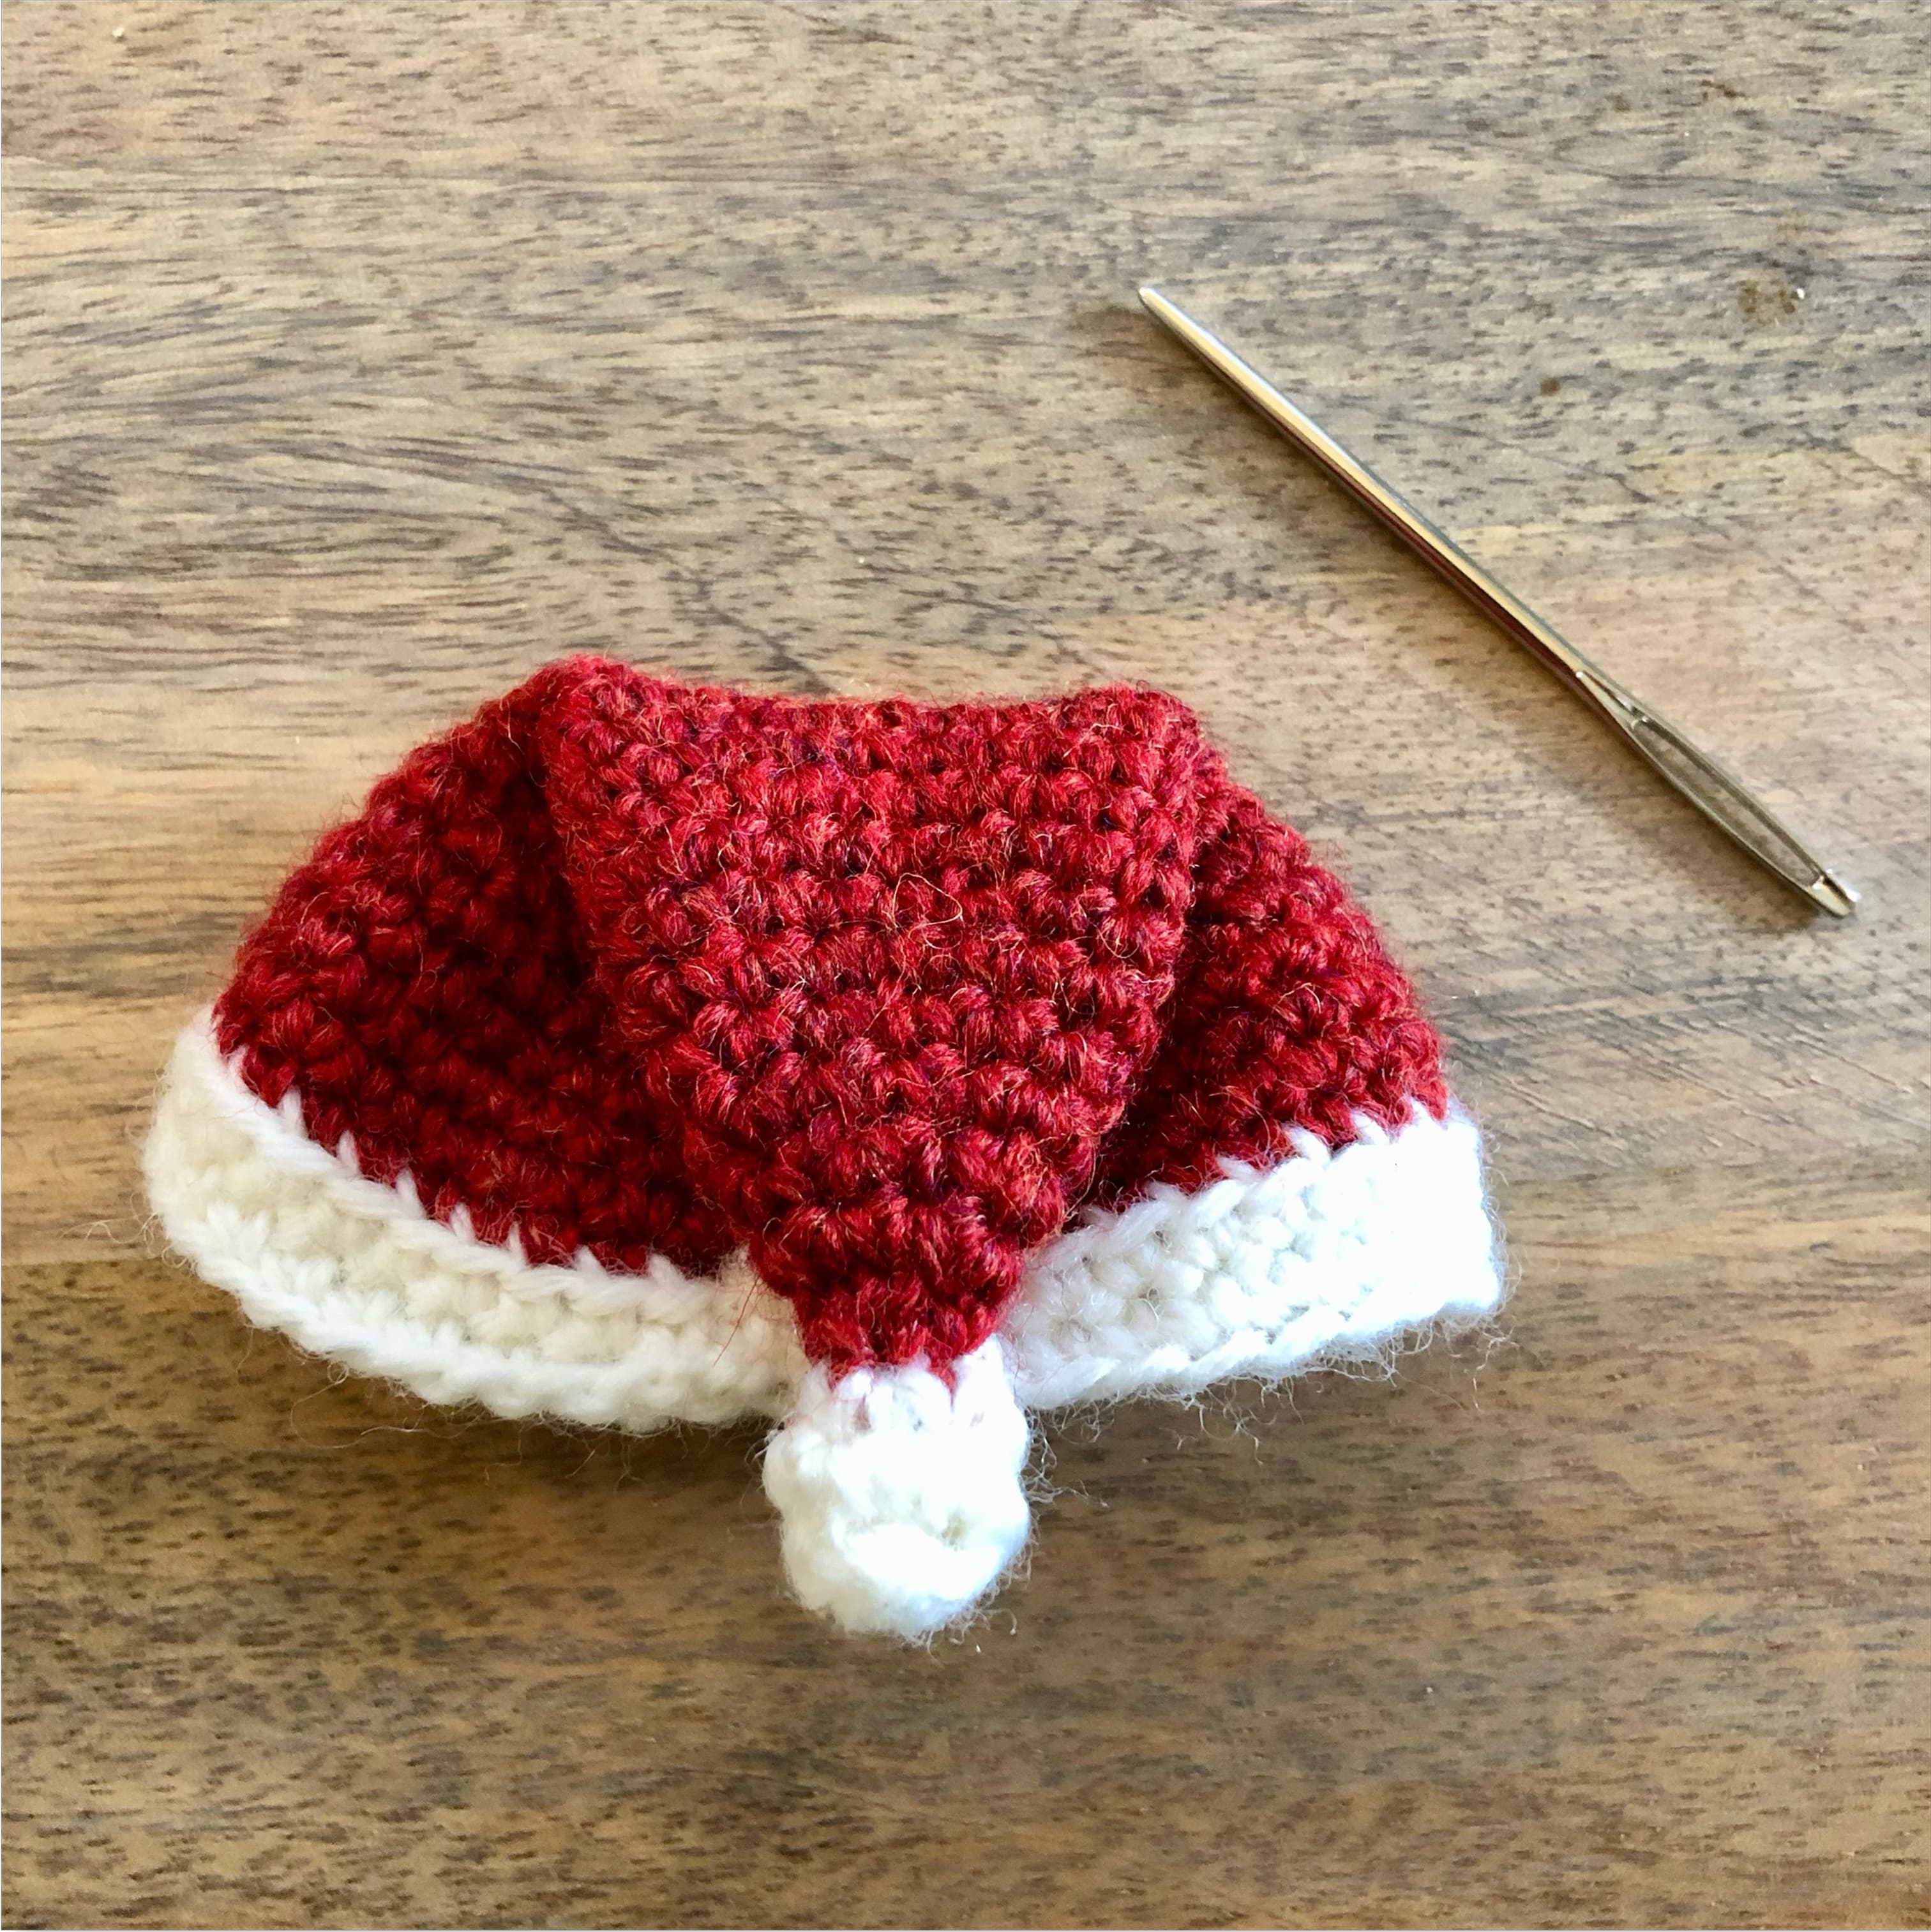
Santa Hat
white
- Make slip knot and ch 44. slst into the first stitch to make a loop.
- R1–2: sc in each stitch (44)
- Switch to red. Cut white yarn, leaving enough length to weave the end into the inside of the hat.
- R2 (blo): sc 44 (44)
- R3–5: sc for entire row (44)
- R6: *sc 2, dec* × 11 (33)
- R7: sc for entire row (33)
- R8: *sc, dec* × 11 (22)
- R9: sc for entire row (22)
- R10: *sc 9, dec* × 2 (20)
- R11–15: sc for entire row (20)
- R16: *sc 3, dec* × 4 (16)
- R17: sc for entire row (16)
- R18: *sc 2, dec* × 4 (12)
- R19: sc for entire row (12)
- R20: *sc, dec* × 4 (8)
- R21: sc for entire row (8)
- R22: *dec* × 4 (4)
- Switch to white. Cut red yarn, leaving a long tail to sew the hat tip down and to attach the hat to the bear.
- R23: *inc* × 4 (8)
- R24: sc in each stitch (8)
- R25: *dec* × 4 (4)
- Break yarn. Use the end to sew the top hole closed. Weave end into the inside of the hat.
- Use the red yarn end to sew the tip of the hat down near the rim, then sew the hat to the bear's head with a few stitches. Or leave unattached if you'd like the hat to be removable.
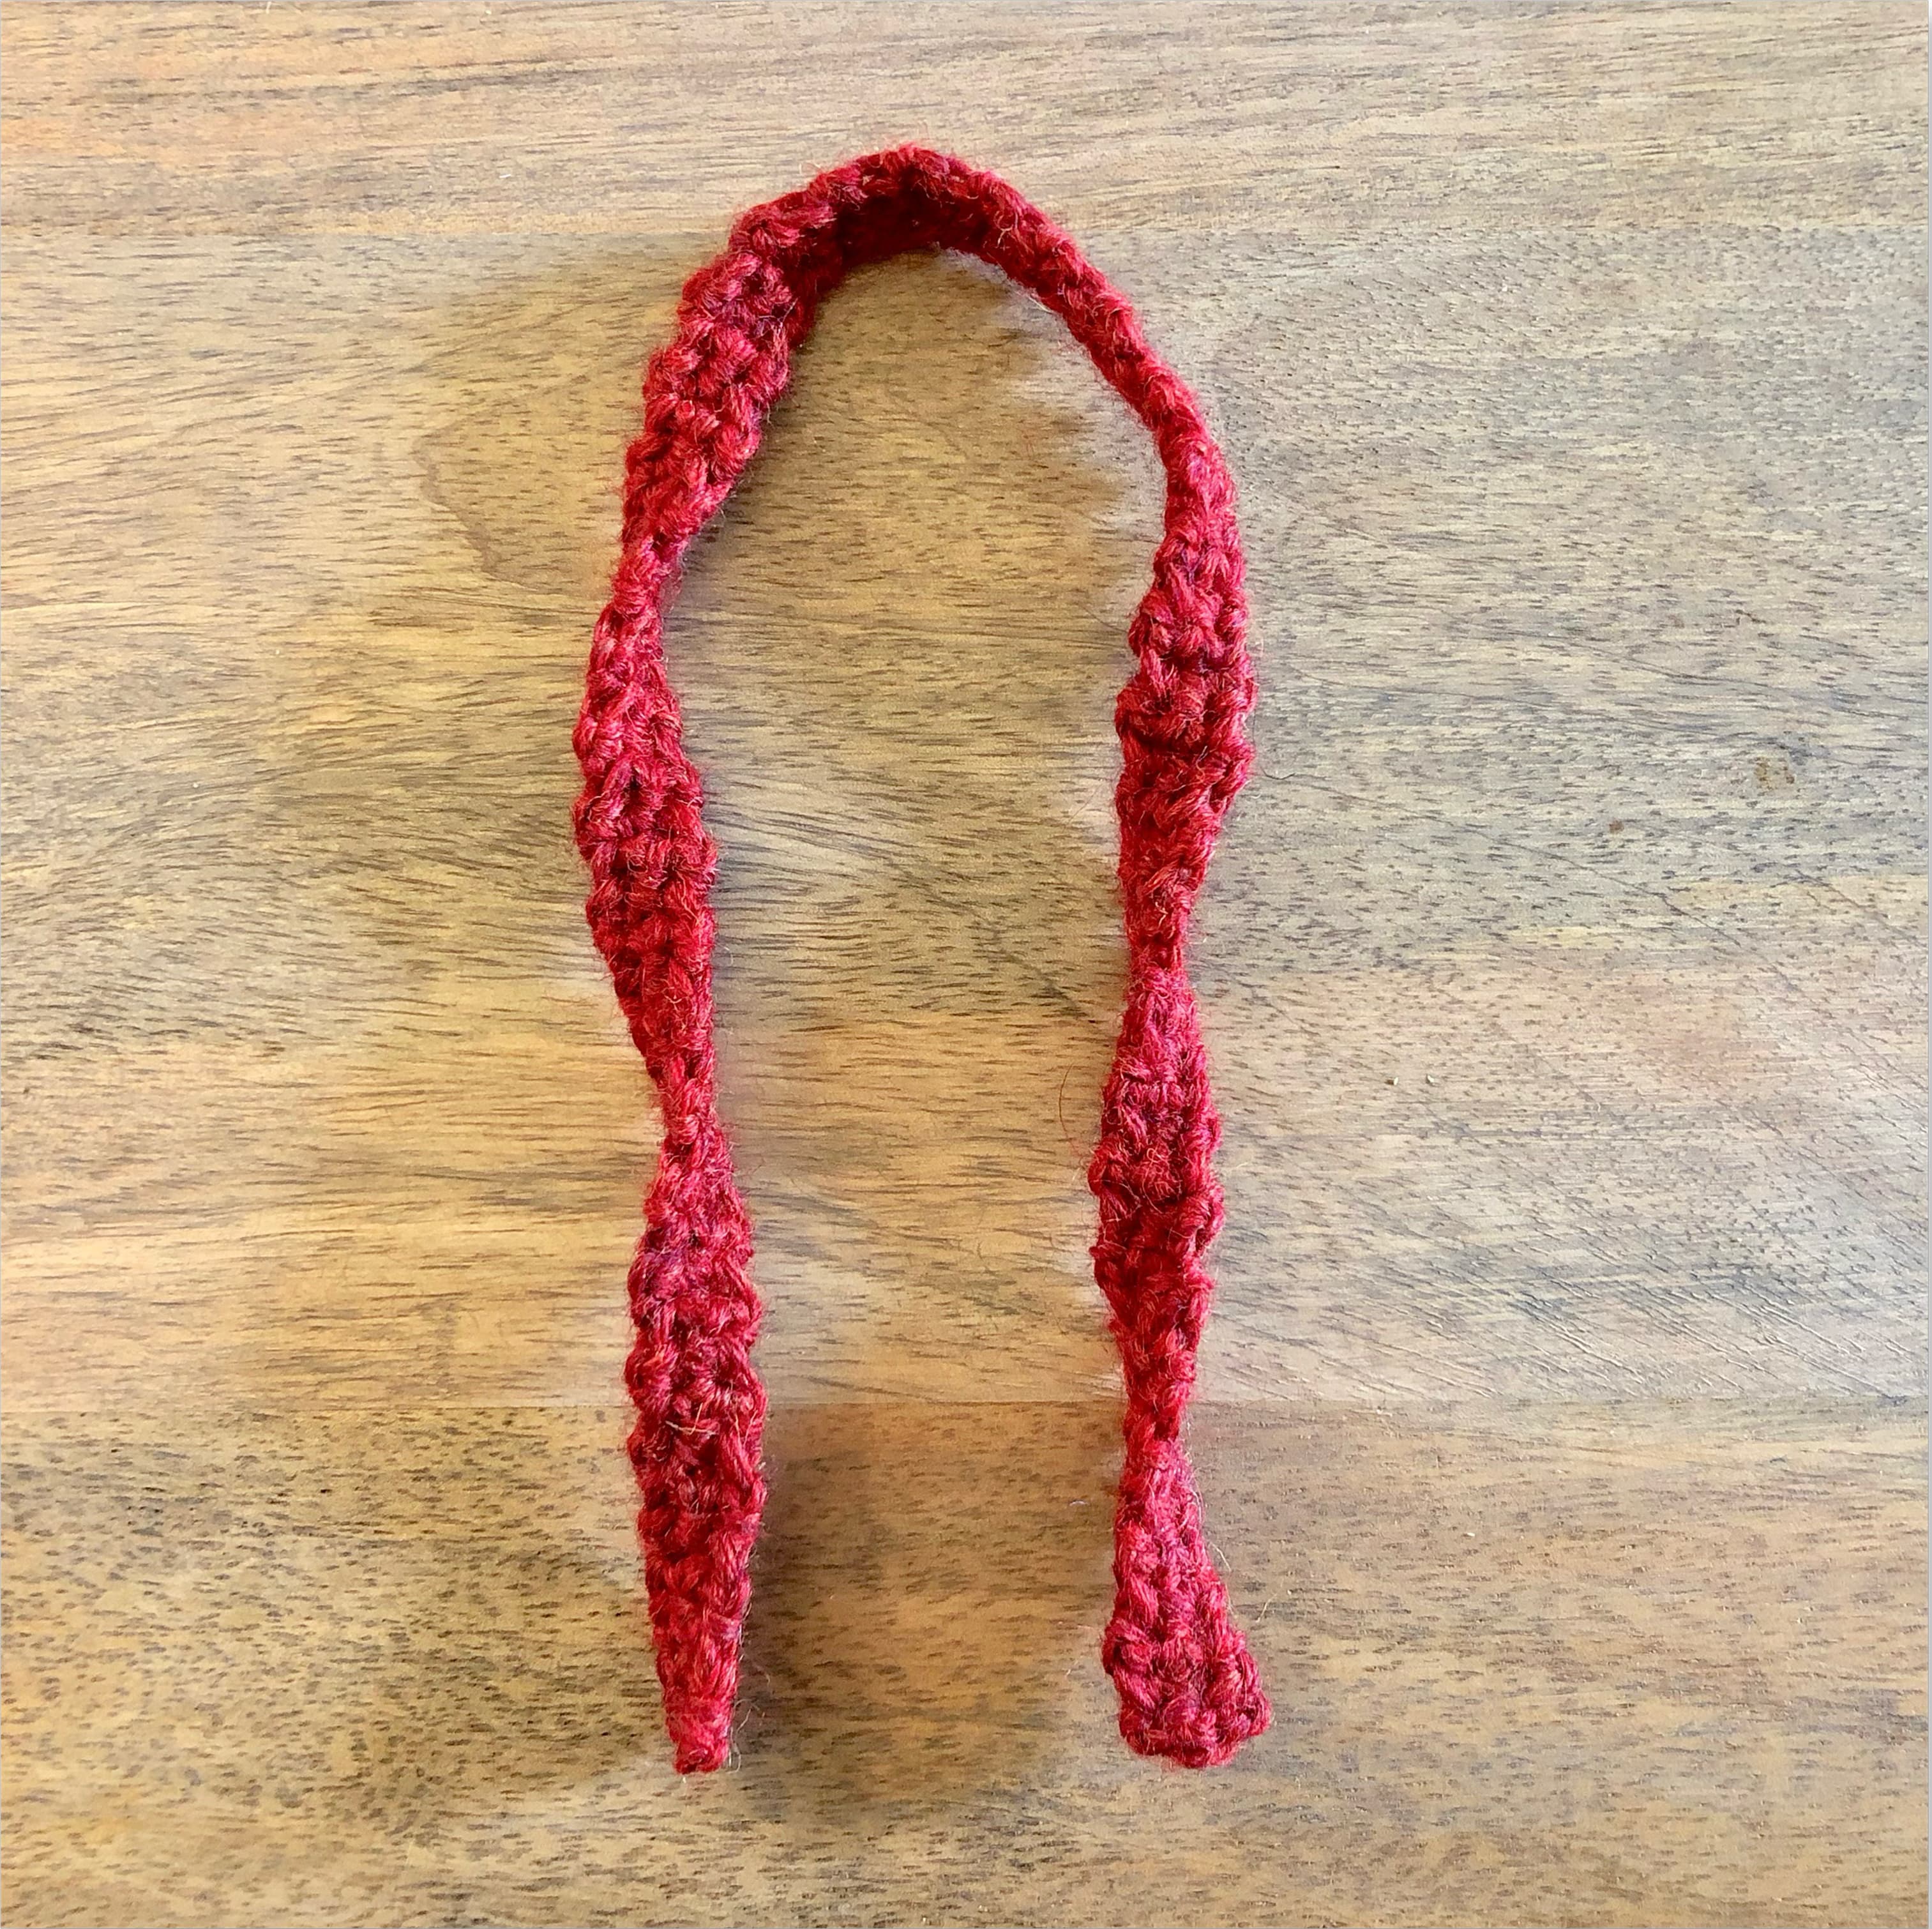
Scarf
red
- Make slip knot and ch 3.
- R1: Skip the stitch closest to the hook and sc in the next two stitches. ch1 and turn. (2)
- R2: sc 2, ch1 and turn. (2)
- Repeat R2 until the scarf is long enough to go around the bear's neck and can be tied like a scarf.
- Bind off and weave ends into the scarf.
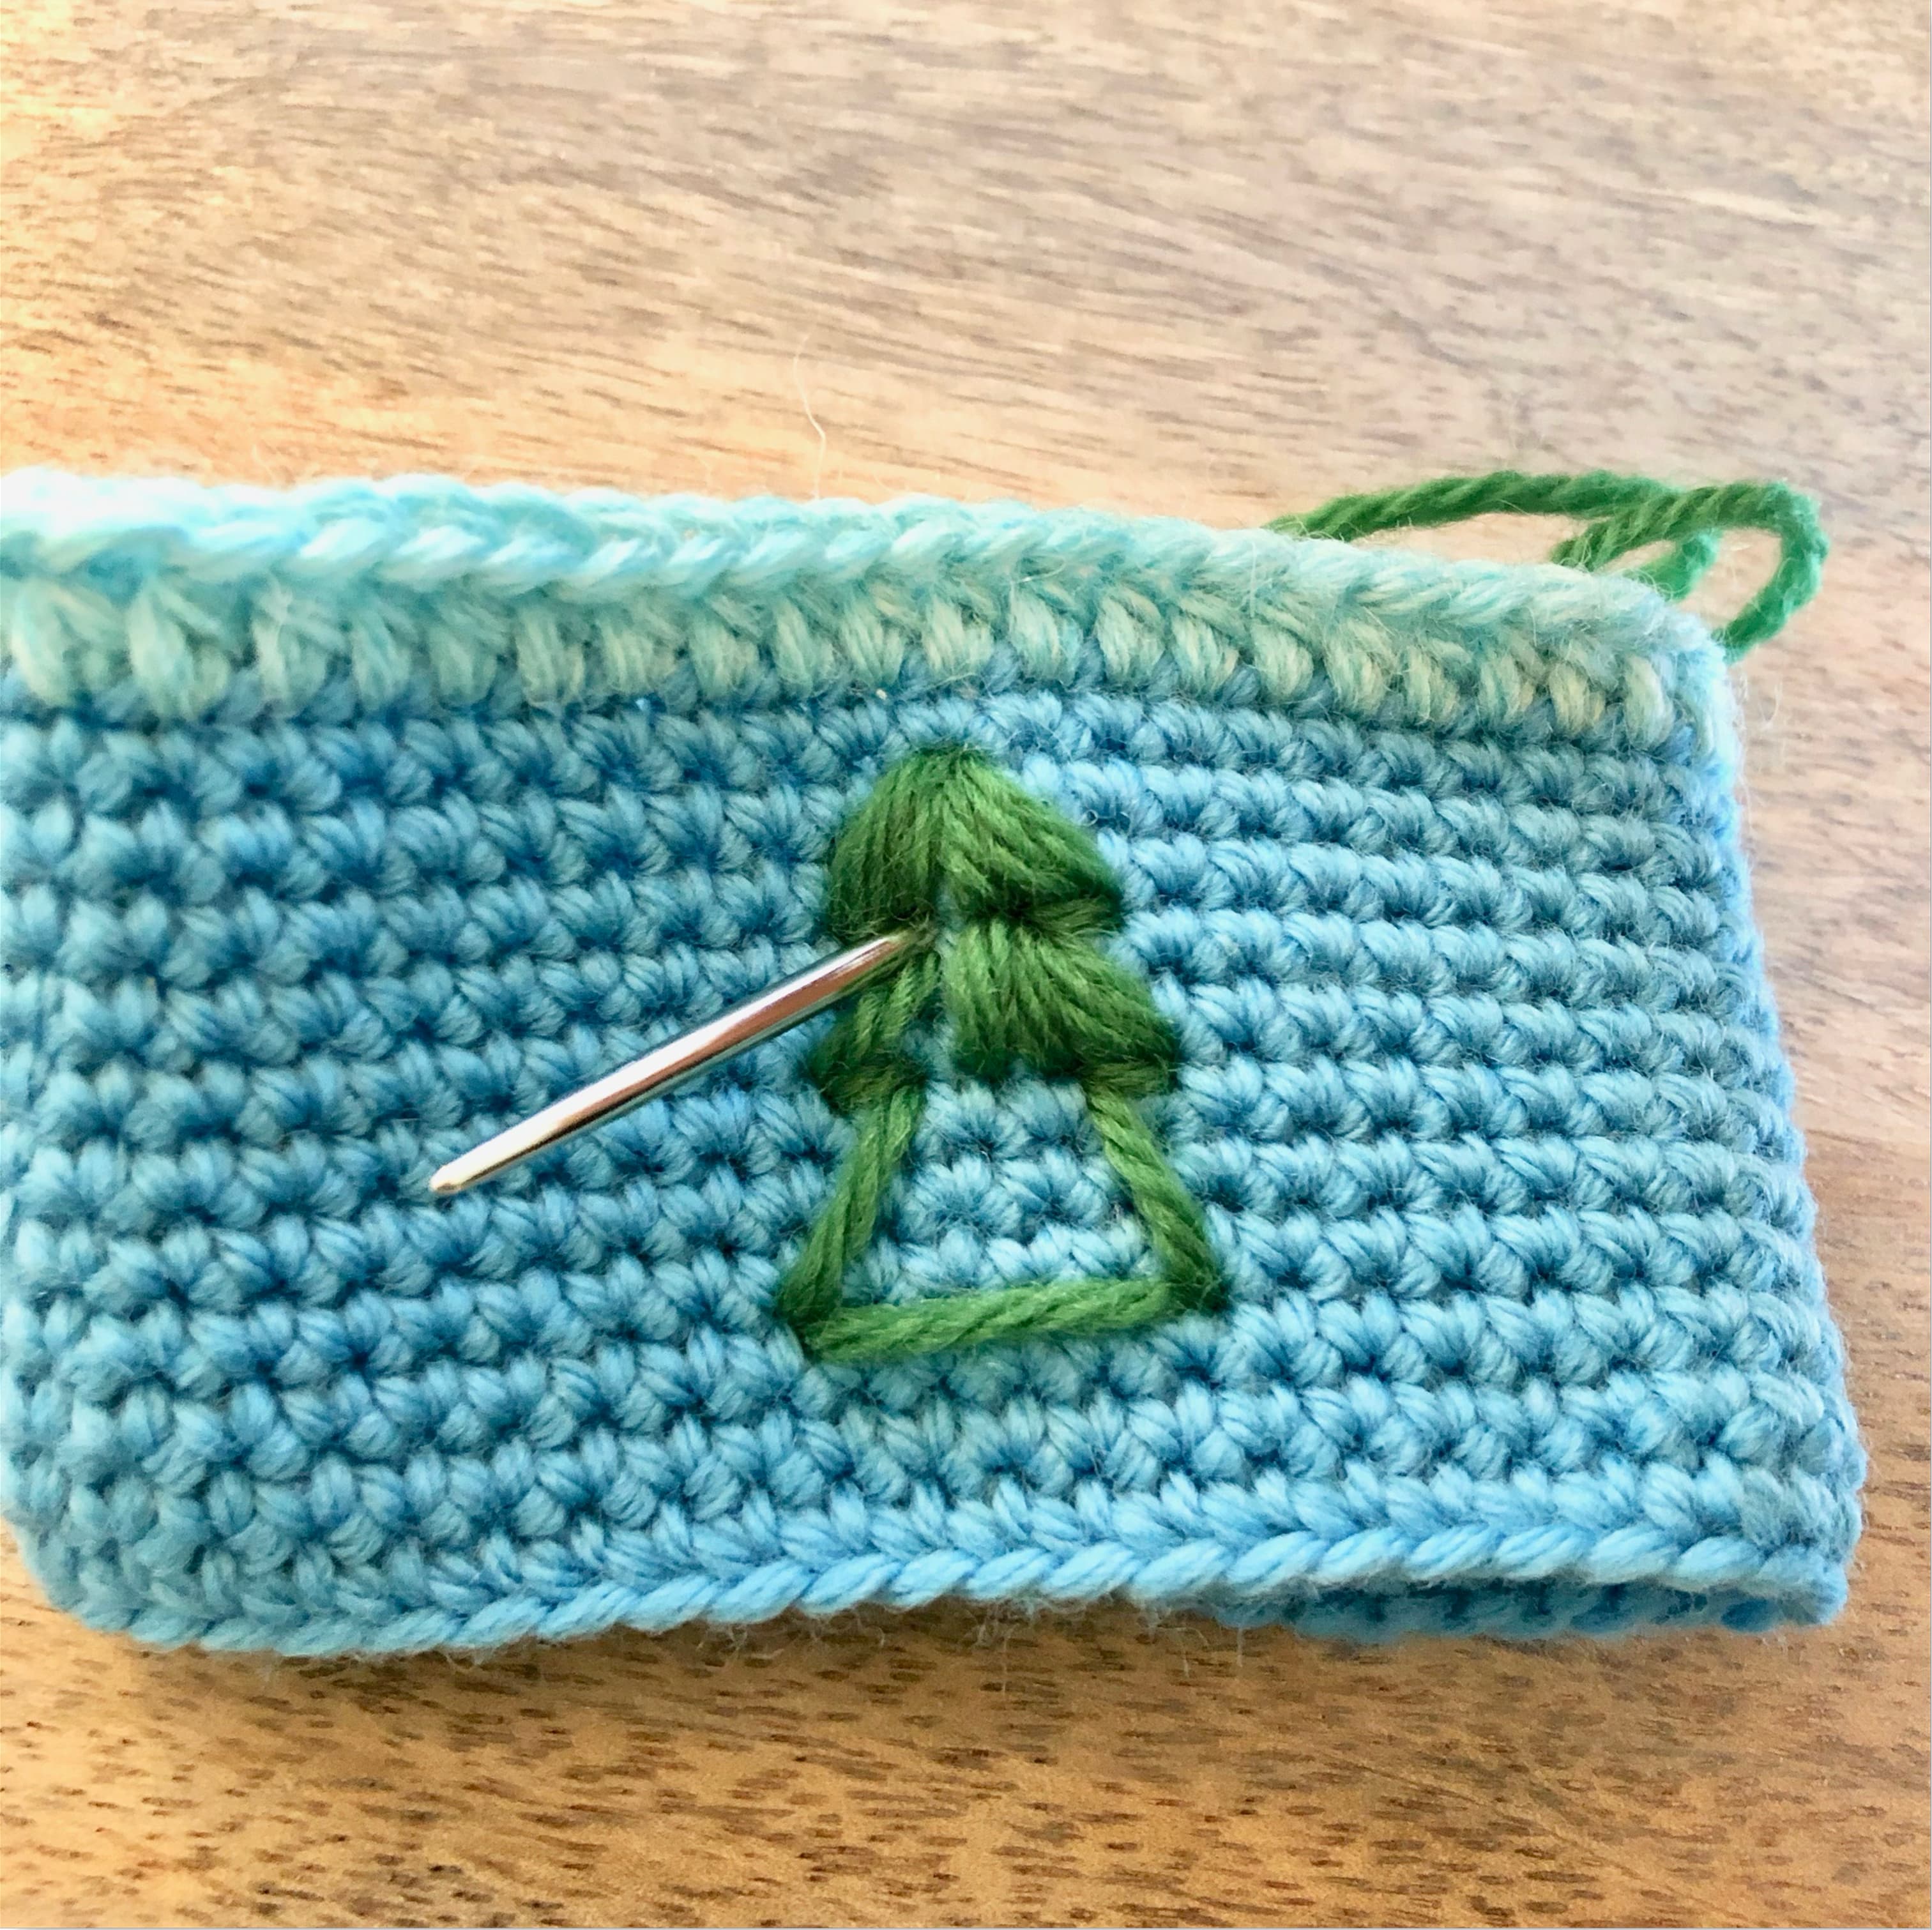
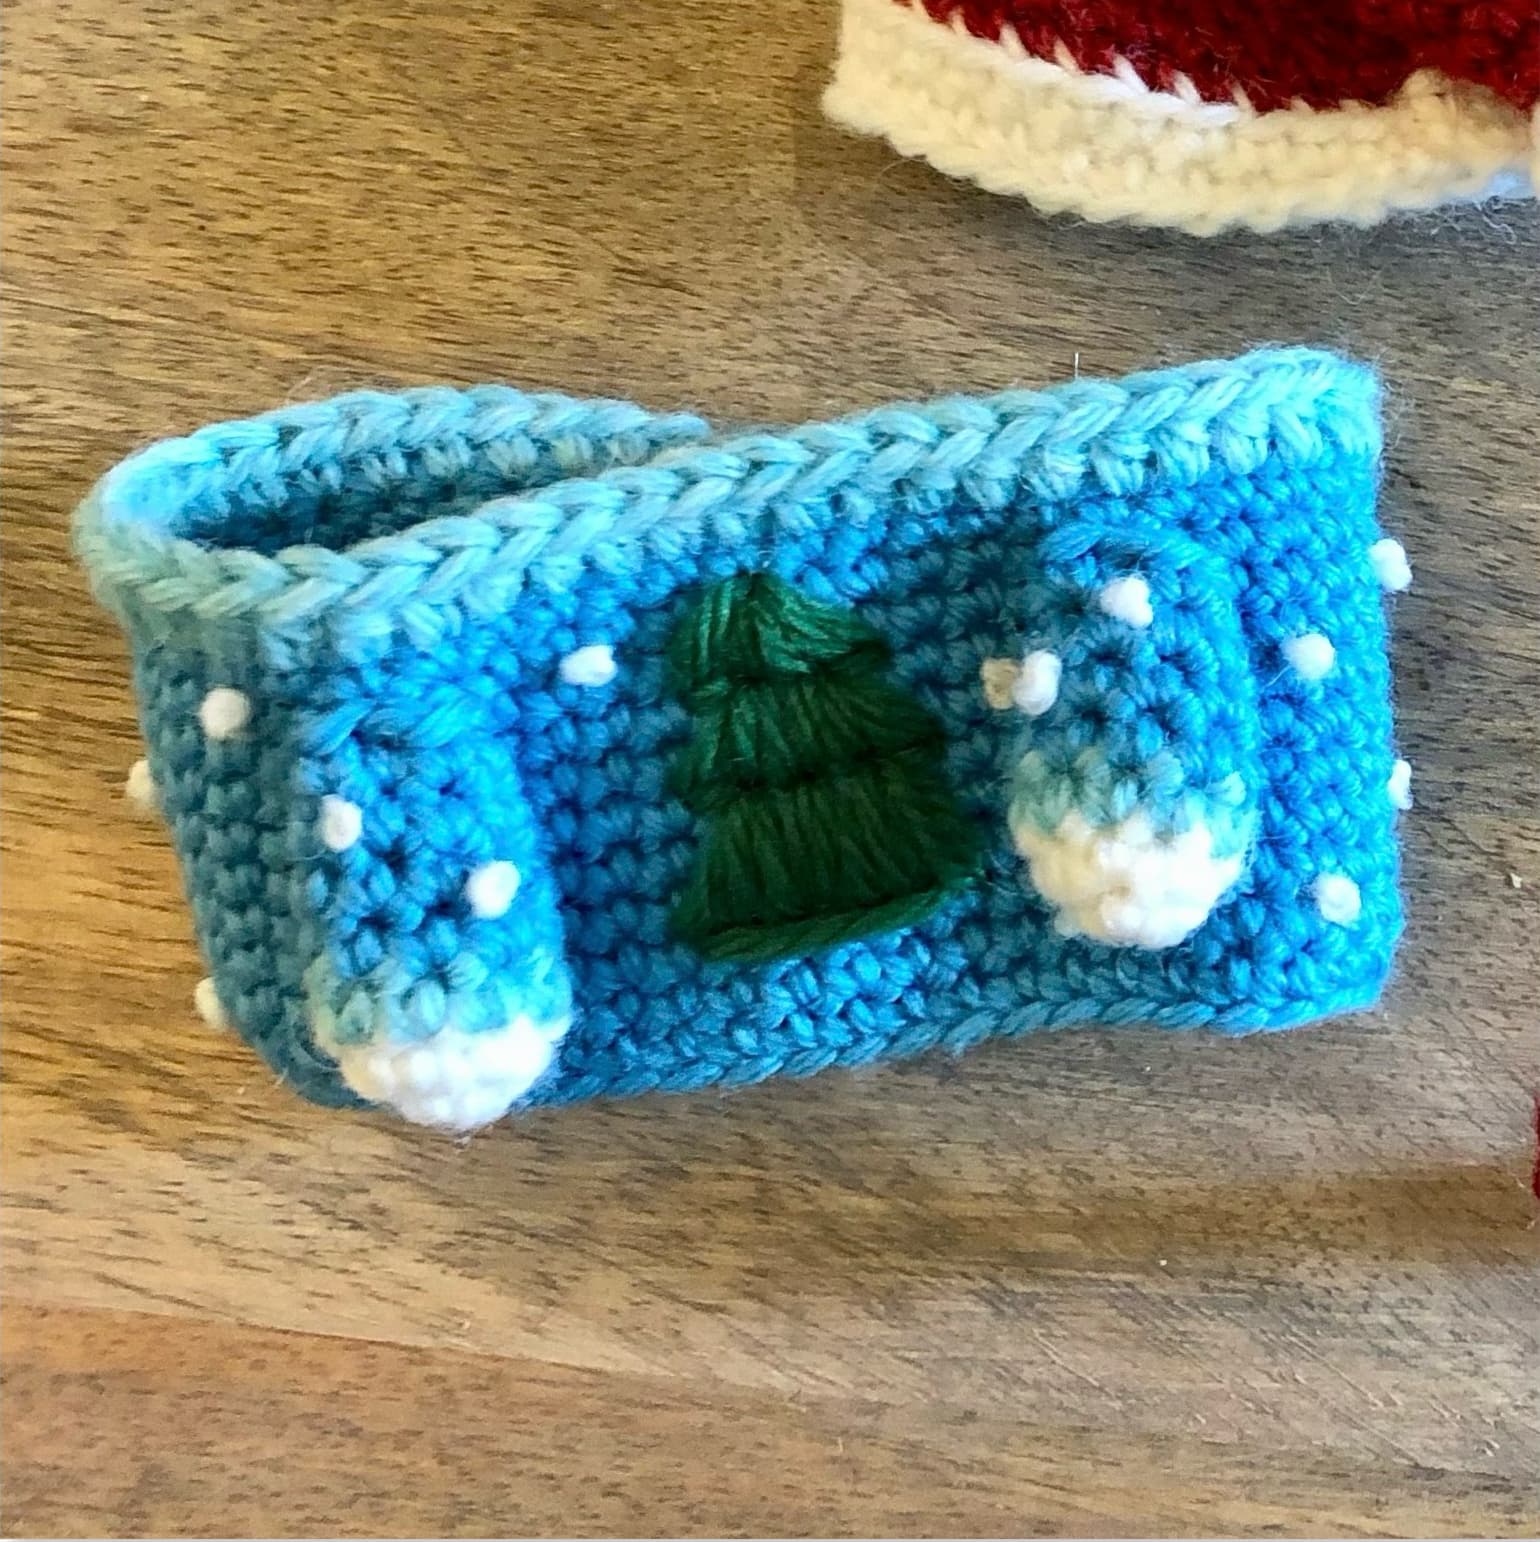
Sweater
darker blue
- Make slip knot and ch 46. slst into the first chain to make a circle.
- R1–11: sc 46 (46)
- Switch to lighter blue.
- R12: hdc 46 (46)
- slst into the first stitch of the row and bind off. Sew the end into the inside of the sweater.
- With green, stitch the shape of a Christmas tree onto the front of the sweater, then fill it in with long stitches. Make your tree any way that works for you.
- For the snowballs: separate a ~12" piece of white yarn into individual strands. Use 2 strands together to make french knots around the sweater. Add as many as you'd like.
Sweater Arms (make 2)
white
- R1: sc 4 in magic loop (4)
- Switch to lighter blue.
- R2: inc in each stitch (8)
- Switch to light blue.
- R3–7: sc for entire row (8)
- Break yarn with a long enough tail to sew the arm to the sweater.
- Tip: place the sweater on the bear first to find the best arm placement.
- Sew the arms to the sweater. You can also stitch the lower part of the arm to the sweater if you'd like the arms to lay flatter against the body.
Assembly
- Place the sweater on Ice Bear.
- Wrap the scarf around Panda.
- Place the hat on Grizzly.
Pattern use
- Personal use is welcome
- You may sell finished items you made by hand — please credit Northwest Stitch as the designer in your listing (small-scale handmade sales only)
- You may not reproduce, sell, or redistribute this pattern itself
- You may not claim the pattern as your own