All patterns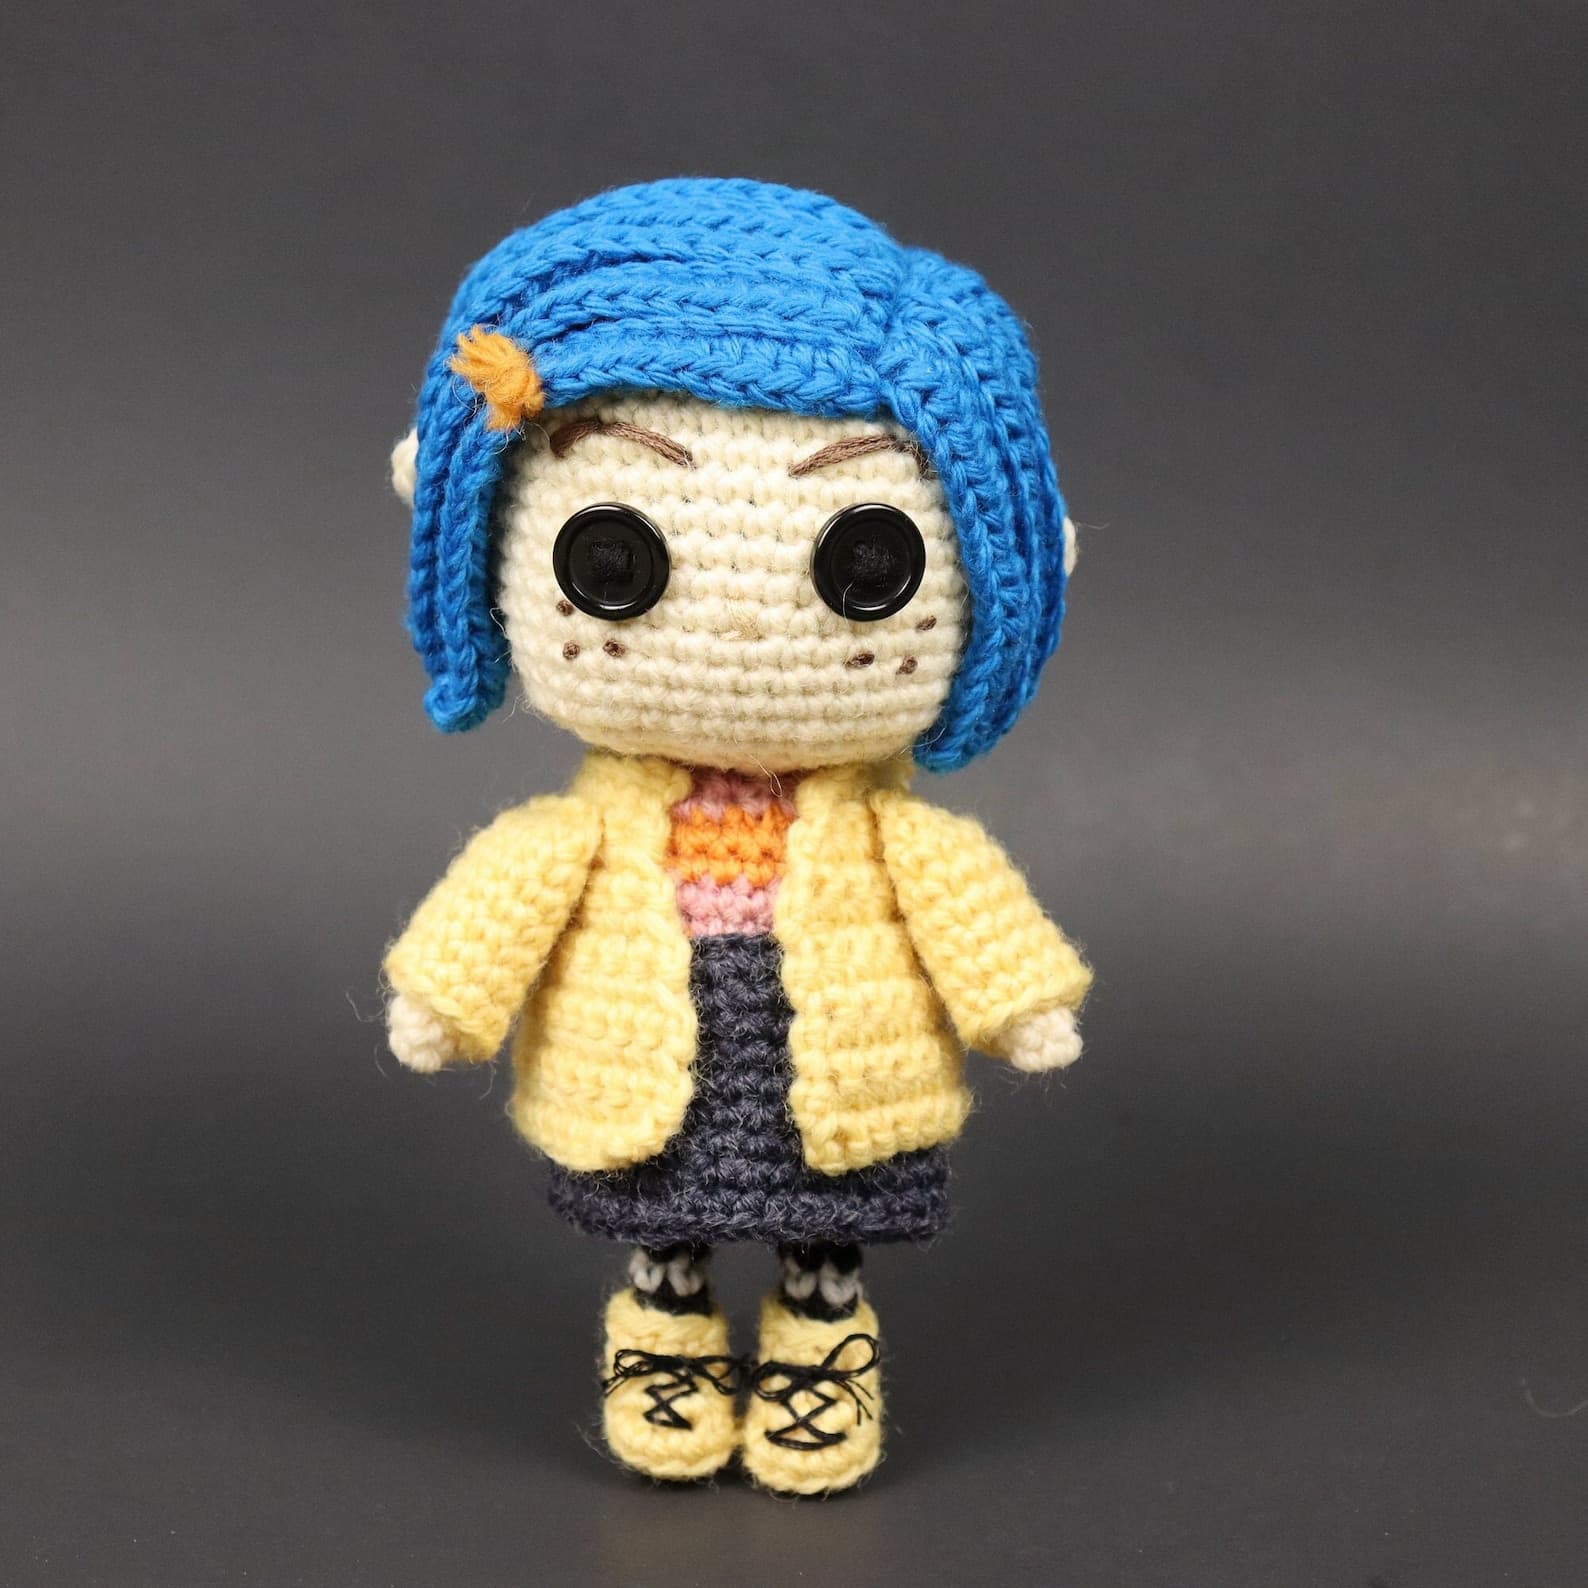


TV & Movie Characters
Coraline
A spooky-cute amigurumi doll inspired by the beloved stop-motion film — perfect for Halloween or any day.
Intermediate
Materials
Blue yarn
Shop on KnitPicks ↗Beige yarn
Shop on KnitPicks ↗Orange yarn
Shop on KnitPicks ↗Pink yarn
Shop on KnitPicks ↗Black yarn
Shop on KnitPicks ↗White yarn
Shop on KnitPicks ↗Yellow yarn
Shop on KnitPicks ↗Dark gray yarn
Shop on KnitPicks ↗Brown embroidery thread
For the eyebrows and freckles
Tan embroidery thread
Slightly darker than the beige yarn — for the nose
Brownish orange yarn — scrap
For the barrette (or any color you prefer)
Two 13mm, 4-hole black buttons
Crochet hook
One to two sizes smaller than suggested for your yarn to keep stitches tight.
Tapestry needle
Shop on Amazon ↗Stuffing
Shop on Amazon ↗Scissors
Abbreviations
Notes
- Use the same yarn weight for all pieces. If different weights are used, the parts may not fit together correctly.
- Color-changing tip for the head: while working through the color-changing rows, loosely carry the unused yarn color across the inside of the head. Once all color-changing rows are complete, cut and tie off the ends inside. Alternatively, use beige for the entire head and add extra hair for full coverage.
Instructions
Head
blue
- R1: sc 6 in magic circle (6)
- R2: *inc* × 6 (12)
- R3: *sc 2, inc* × 4 (16)
- R4: *sc 2, inc, inc* × 4 (24)
- R5: sc 3, inc, inc, *sc 4, inc, inc* × 3, sc (32)
- R6: sc 4, inc, inc, *sc 6, inc, inc* × 3, sc 2 (40)
- R7: sc 5, inc, inc, *sc 8, inc, inc* × 3, sc 3 (48)
- R8: sc 6, inc, inc, *sc 10, inc, inc* × 3, sc 4 (56)
- R9: (blue) sc 6, dec, dec, sc 8 — (beige) sc 2, dec, dec, sc 10, dec, dec, sc 2 — (blue) sc 8, dec, dec, sc 4 (48)
- R10–11: (blue) sc 17 — (beige) sc 19 — (blue) sc 12 (48)
- R12–13: (blue) sc 17 — (beige) sc 20 — (blue) sc 11 (48)
- R14–15: (blue) sc 14 — (beige) sc 26 — (blue) sc 8 (48)
- R16–17: (blue) sc 14 — (beige) sc 27 — (blue) sc 7 (48)
- R18: (blue) sc 14 — (beige) sc 34 (48)
- R19–20: (beige) sc for entire row (48)
- R21: *sc 8, dec, dec* × 4 (40)
- Make the face before continuing — see the Making the Face section below. Then begin stuffing.
- R22: *sc 2, dec* × 10 (30)
- R23: *sc, dec* × 10 (20)
- R24: dec for entire row (10)
- R25: sc for entire row (10)
- Bind off, finish stuffing, then sew the end into the head to hide.
Making the Face
- Sew the buttons onto the face with black yarn over rows 14 and 15, with five stitches between them.
- Sew the nose with tan embroidery thread in the shape of an upside-down "7".
- Sew the eyebrows with brown embroidery thread two rows above the buttons.
- Using two strands of brown embroidery thread, add french knots below the buttons as freckles.
- Tie all ends to secure everything in place.
Ear (make two)
beige
- R1: sc 6 in magic circle (6)
- Bind off.
Longer Hair (make six)
blue
- Make a slip knot, then ch 26.
- R1: Skip the chain the hook is in and the next one. hdc in the remaining chains. (24)
- Bind off. These pieces will be sewn to the head.
Shorter Hair (make 12)
blue
- Make a slip knot, then ch 18.
- R1: Skip the chain the hook is in and the next one. hdc in the remaining chains. (16)
- Bind off. These pieces will be sewn to the head.
Body
pink
- R1: sc 6 in magic circle (6)
- R2: *inc* × 6 (12)
- R3: *sc, inc* × 6 (18)
- R4: *sc 2, inc* × 6 (24)
- R5: sc for entire row (24)
- Switch to orange.
- R6–7: sc for entire row (24)
- Switch to pink.
- R8–9: sc for entire row (24)
- Switch to orange.
- R10–11: sc for entire row (24)
- Switch to pink.
- R12: *sc 2, dec* × 6 (18)
- R13: *sc, dec* × 6 (12)
- Bind off. The body will be sewn to the head.
Skirt
dark gray
- Make a slip knot. Leave a long enough tail to sew the skirt to the body later.
- Ch 25, then slst into the first chain to make a closed circle. (25)
- R1–2: sc for entire row (25)
- R3: *sc 4, inc* × 5 (30)
- R4–5: sc for entire row (30)
- R6: *sc 5, inc* × 5 (35)
- R7–9: sc for entire row (35)
- Bind off. The skirt will be sewn to the body.
Leg (make two)
black
- R1: sc 5 in magic circle (5)
- R2: sc for entire row (5)
- Switch to white, then alternate between black and white with each row for the rest of the leg.
- R3–10: sc for entire row (5)
- Bind off.
Boot (make two)
yellow
- R1: sc 6 in magic circle (6)
- R2: inc, sc, inc, inc, sc, inc (10)
- R3 (blo): sc for entire row (10)
- R4: sc 3, dec, dec, sc 3 (8)
- R5: sc 3, dec, sc 3 (7)
- R6: sc for entire row (7)
- Bind off.
Arm (make two)
beige
- R1: sc 5 in magic circle (5)
- R2–7: sc for entire row (5)
- Bind off. Tuck the end into the arm to hide.
Sleeve (make two)
yellow
- Ch 12, then slst into the first chain to make a circle.
- R1–7: sc for entire row (12)
- Bind off. The sleeve will be sewn to the raincoat.
Raincoat
yellow
- Ch 23. Ch 1 and turn at the end of each row.
- R1: sc in the second chain from the hook, then sc in each remaining chain. (22)
- R2: sc for entire row (22)
- R3: inc, sc 20, inc (24)
- R4: sc for entire row (24)
- R5: *sc 5, inc* × 4 (28)
- R6: sc for entire row (28)
- R7: *sc 6, inc* × 4 (32)
- R8–12: sc for entire row (32)
- Bind off. The raincoat will be sewn to the body and skirt.
Hood
yellow
- Make a slip knot, then ch 5.
- R1: sc in the first chain from the hook, then sc 3 more. sc twice into the last stitch — this curves the stitches into a half circle. sc 3 in the bottom of the top row's stitches. sc 3 more into the last stitch to complete the oval. (12)
- R2: sc for entire row (12)
- R3: *sc 4, inc, inc* × 2 (16)
- R4: sc for entire row (16)
- R5: *sc 6, inc, inc* × 2 (20)
- R6: sc for entire row (20)
- Bind off. The hood will be sewn to the raincoat.
Assembly — Ears and Hair
- Sew each ear to one side of the head over rows 14 and 15, centered between the front and back of the head.
- Use the two tails of each hair piece to attach it to the scalp. Use the longer tail to make at least two loose stitches along the length of the piece to keep it in place. Attach the hair to give Coraline a side part on the left side of her head. When each piece is done, sew the ends out from the bottom of the head to be tied and tucked away before attaching the body.
- Attach the twelve shorter hair pieces along the left side of the head and around the back. Allow the left ear to poke through.
- Attach the six longer hair pieces along the part and down the right side of the head. Allow the right ear to poke through.
- Tie, cut, and tuck all loose ends into the head.
- Tie a bow with scrap yarn to make the barrette and attach it along the part.
Assembly — Boots and Legs
- Using black embroidery thread, sew the laces onto the boots making two X shapes with a line at the bottom.
- Put the legs into the boots.
- Sew the boots onto the legs using the boot ends, then hide the ends inside the boots.
- Sew the legs at the base of the body using the leg ends.
- Optional: sew the boots together if you'd like the legs to stay close.
Assembly — Clothes
- Sew the skirt onto the body.
- Sew the hood to the top center of the raincoat.
- Place the arms into the sleeves.
- Sew the sleeves to the sides of the raincoat, sewing through the arms at the same time to keep them in place.
- Sew the raincoat onto the body.
- Sew the body to the head.
Et voilà!
Pattern use
- Personal use is welcome
- You may sell finished items you made by hand — please credit Northwest Stitch as the designer in your listing (small-scale handmade sales only)
- You may not reproduce, sell, or redistribute this pattern itself
- You may not claim the pattern as your own