All patterns


TV & Movie Characters
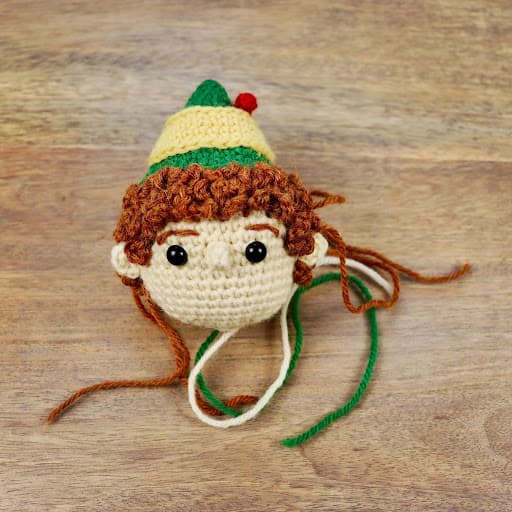
Buddy the Elf
The best way to spread Christmas cheer is crocheting this little guy for all to hear. A festive holiday gift for any Elf fan.
Intermediate
Materials
Light brown yarn (hair)
Shop on KnitPicks ↗Beige yarn (skin)
Shop on KnitPicks ↗Green yarn (coat and hat)
Shop on KnitPicks ↗Yellow yarn (hat band and tights)
Shop on KnitPicks ↗Black yarn (belt and boots)
Shop on KnitPicks ↗Red yarn (hat feather)
Shop on KnitPicks ↗White yarn (coat fur)
Shop on KnitPicks ↗Gray yarn (belt buckle)
Shop on KnitPicks ↗Plastic safety eyes (x2)
Sized to fit the weight of yarn you are using.
Crochet hook
One to two sizes smaller than suggested for your yarn.
Tapestry needle
Shop on Amazon ↗Stuffing
Shop on Amazon ↗Scissors
Abbreviations
Notes
- Use the same yarn weight for all pieces so they fit together correctly. Exception: the hair and the belt buckle can be done in a different yarn size without affecting fit.
- Choose a hook one to two sizes smaller than suggested for your yarn to keep stitches tight.
- Color-changing tip for the head: while working through the color-changing rows, loosely carry the unused yarn color across the inside of the head. Once all color-changing rows are complete, cut through the strands inside and tie knots with the ends. Alternatively, use skin color for the whole head and add extra hair for full coverage.
Instructions
Ear (make two)
beige
- R1: sc 6 in magic circle (6)
- Bind off. Leave a long tail to sew the ear to the head.
Nose
beige
- R1: sc 4 in magic circle (4)
- Bind off. Leave a long tail to sew the nose to the head.
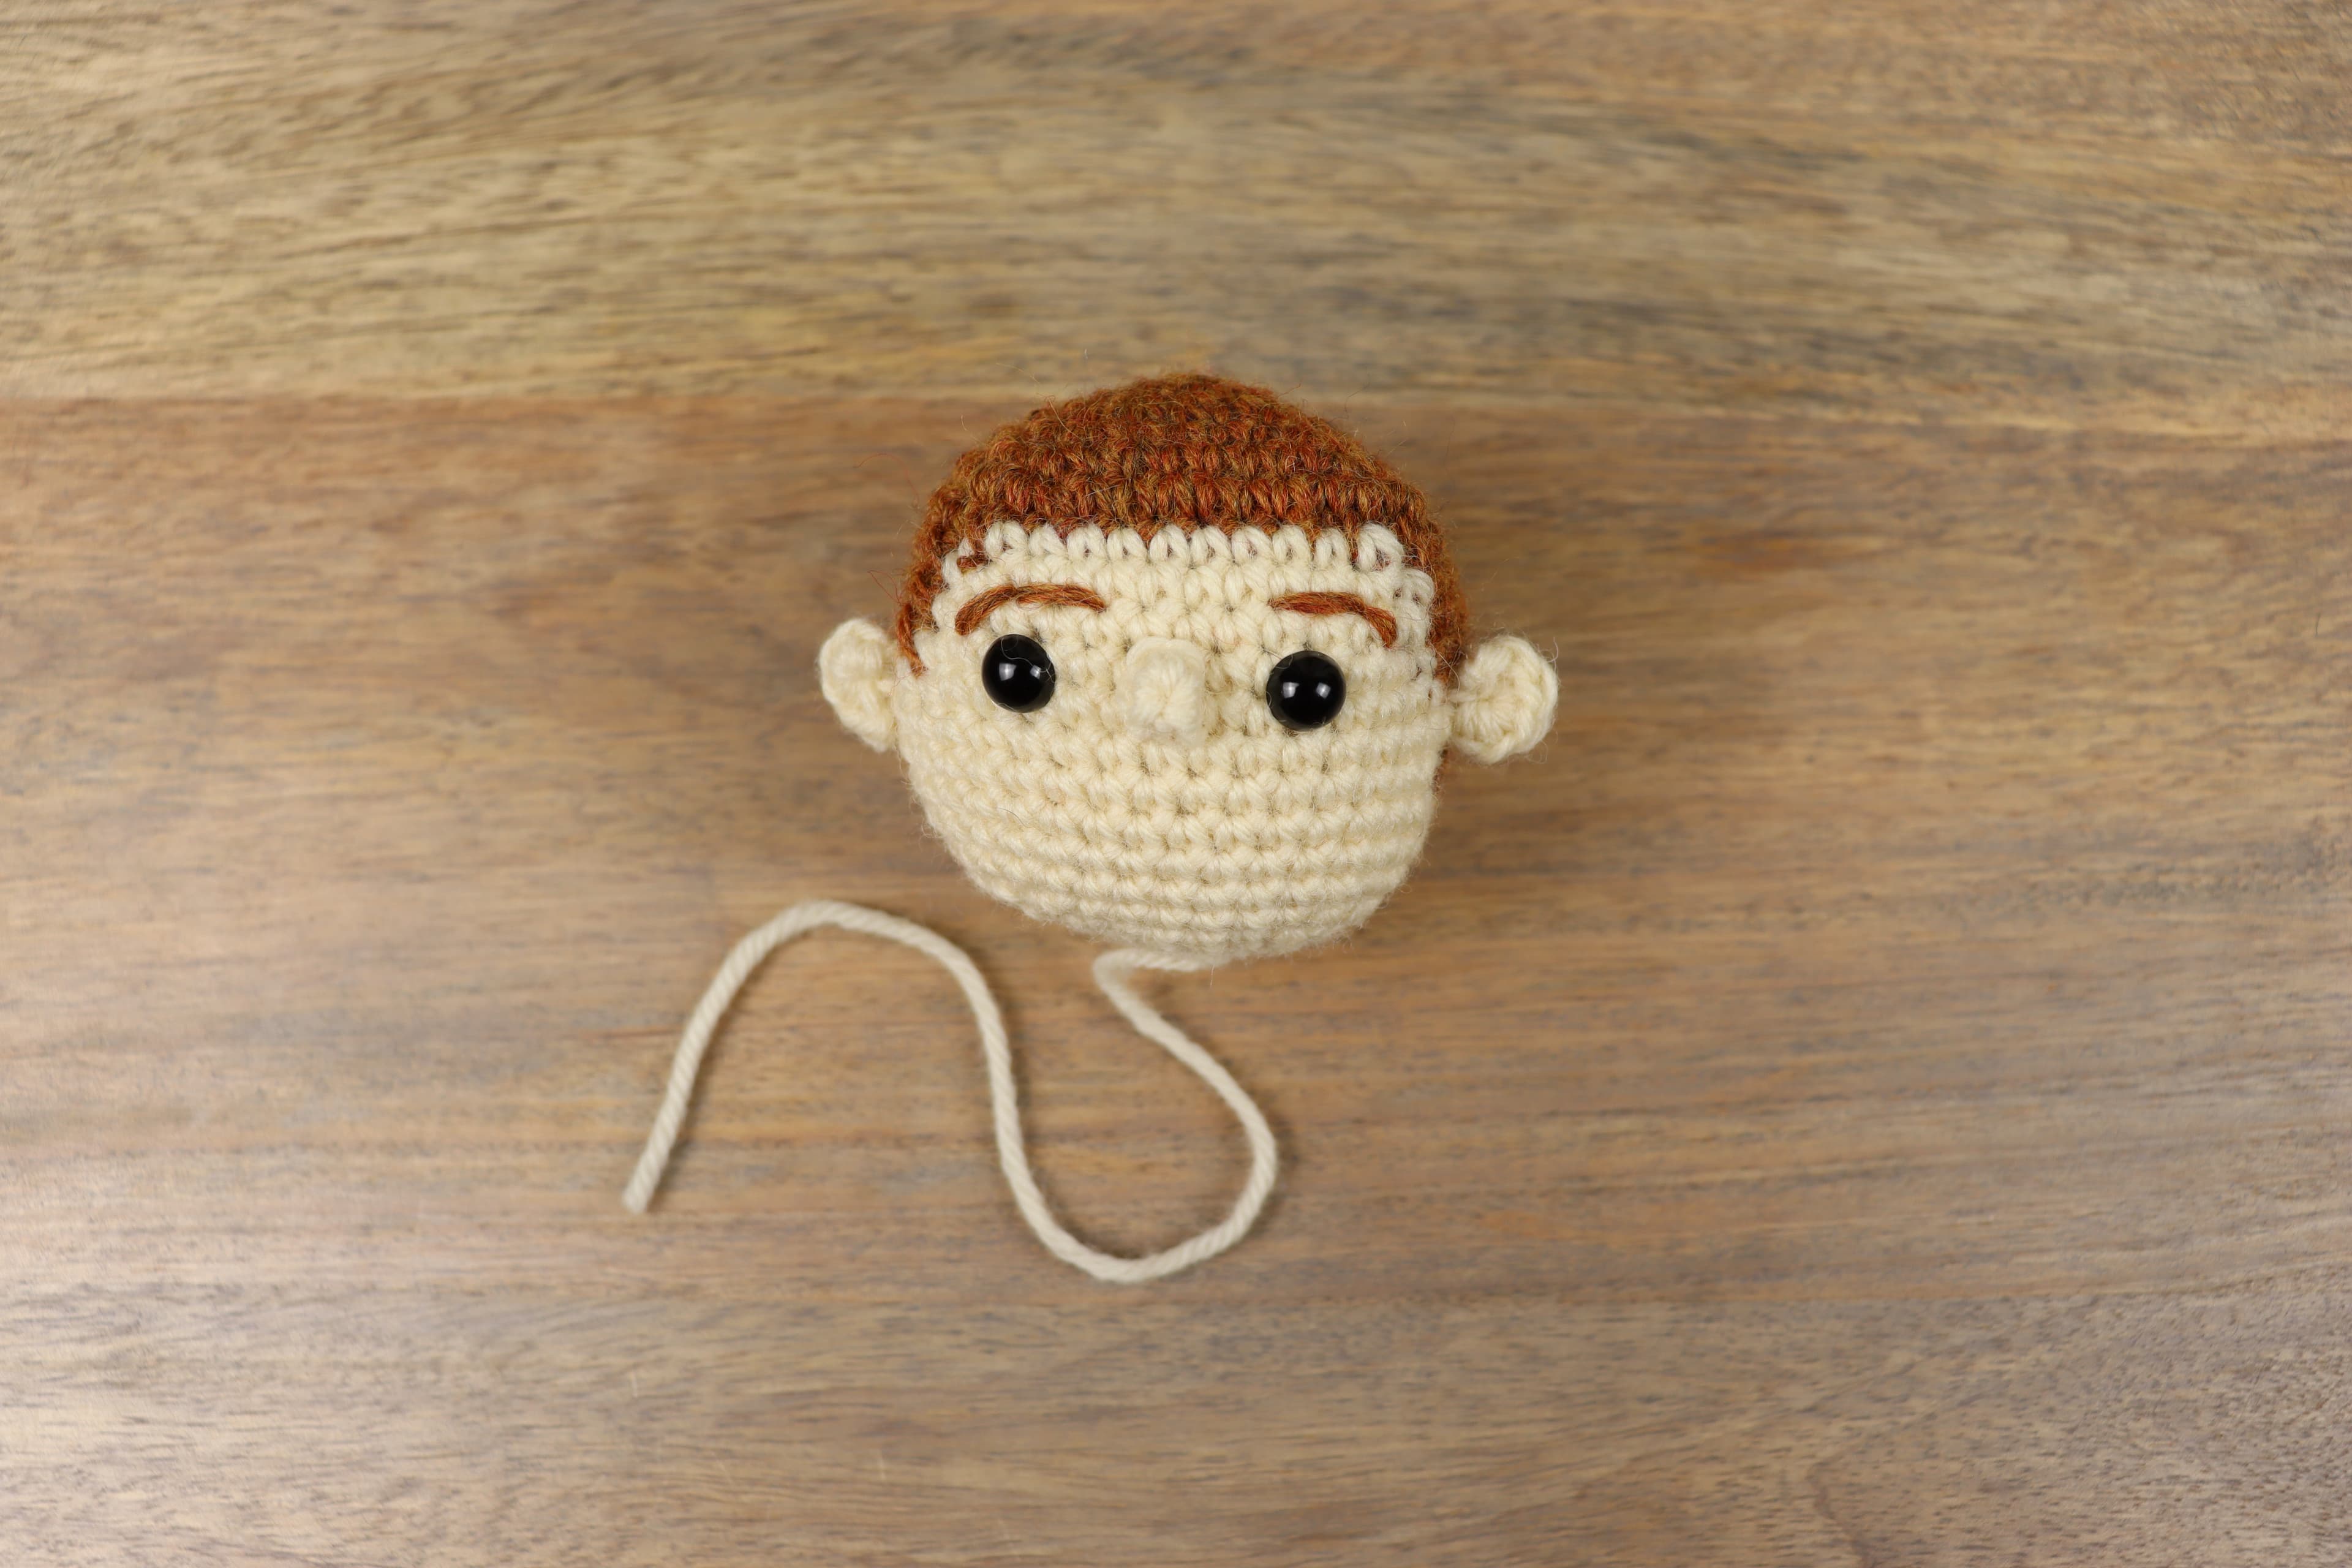
Head
light brown
- R1: sc 6 in magic circle (6)
- R2: *inc* × 6 (12)
- R3: *sc 2, inc* × 4 (16)
- R4: *sc 2, inc, inc* × 4 (24)
- R5: sc 3, inc, inc, *sc 4, inc, inc* × 3, sc (32)
- R6: sc 4, inc, inc, *sc 6, inc, inc* × 3, sc 2 (40)
- R7: sc 5, inc, inc, *sc 8, inc, inc* × 3, sc 3 (48)
- R8: sc 5, dec, dec, sc 8, dec, (switch to skin/beige) dec, sc 8, dec, (switch to hair) dec, sc 8, dec, dec, sc 3 (40)
- R9: sc 15, (switch to skin) sc 12, (switch to hair) sc 13 (40)
- R10: sc 15, (switch to skin) sc 12, (switch to hair) sc 13 (40)
- R11: sc 15, (switch to skin) sc 13, (switch to hair) sc 12 (40)
- R12–14: sc 13, (switch to skin) sc 17, (switch to hair) sc 10 (40)
- R15: sc 13, (switch to skin) sc to the end (40)
- R16–17: sc for entire row (40)
- Add the eyes and face now — see the Making the Face section below.
- R18: *sc 6, dec, dec* × 4 (32)
- R19: sc 5, dec, dec, sc 4, dec, dec, sc 4, dec, dec, sc 5, dec (25)
- R20: sc 5, dec, *sc 4, dec* × 3 (21)
- R21: dec × 10 (leave one stitch undone — it becomes the start of the last row) (11)
- R22: dec × 5 (5)
- Bind off.
Making the Face
- Add the safety eyes between rows 11 and 12 with five stitches between them.
- Sew the nose between the eyes at the same level.
- Sew the eyebrows with the hair yarn.
- Sew the ears to each side of the head at the same level as the eyes and nose, positioned slightly closer to the front than the back. It's fine to place them on top of brown (hair) stitches — the hair will cover it.
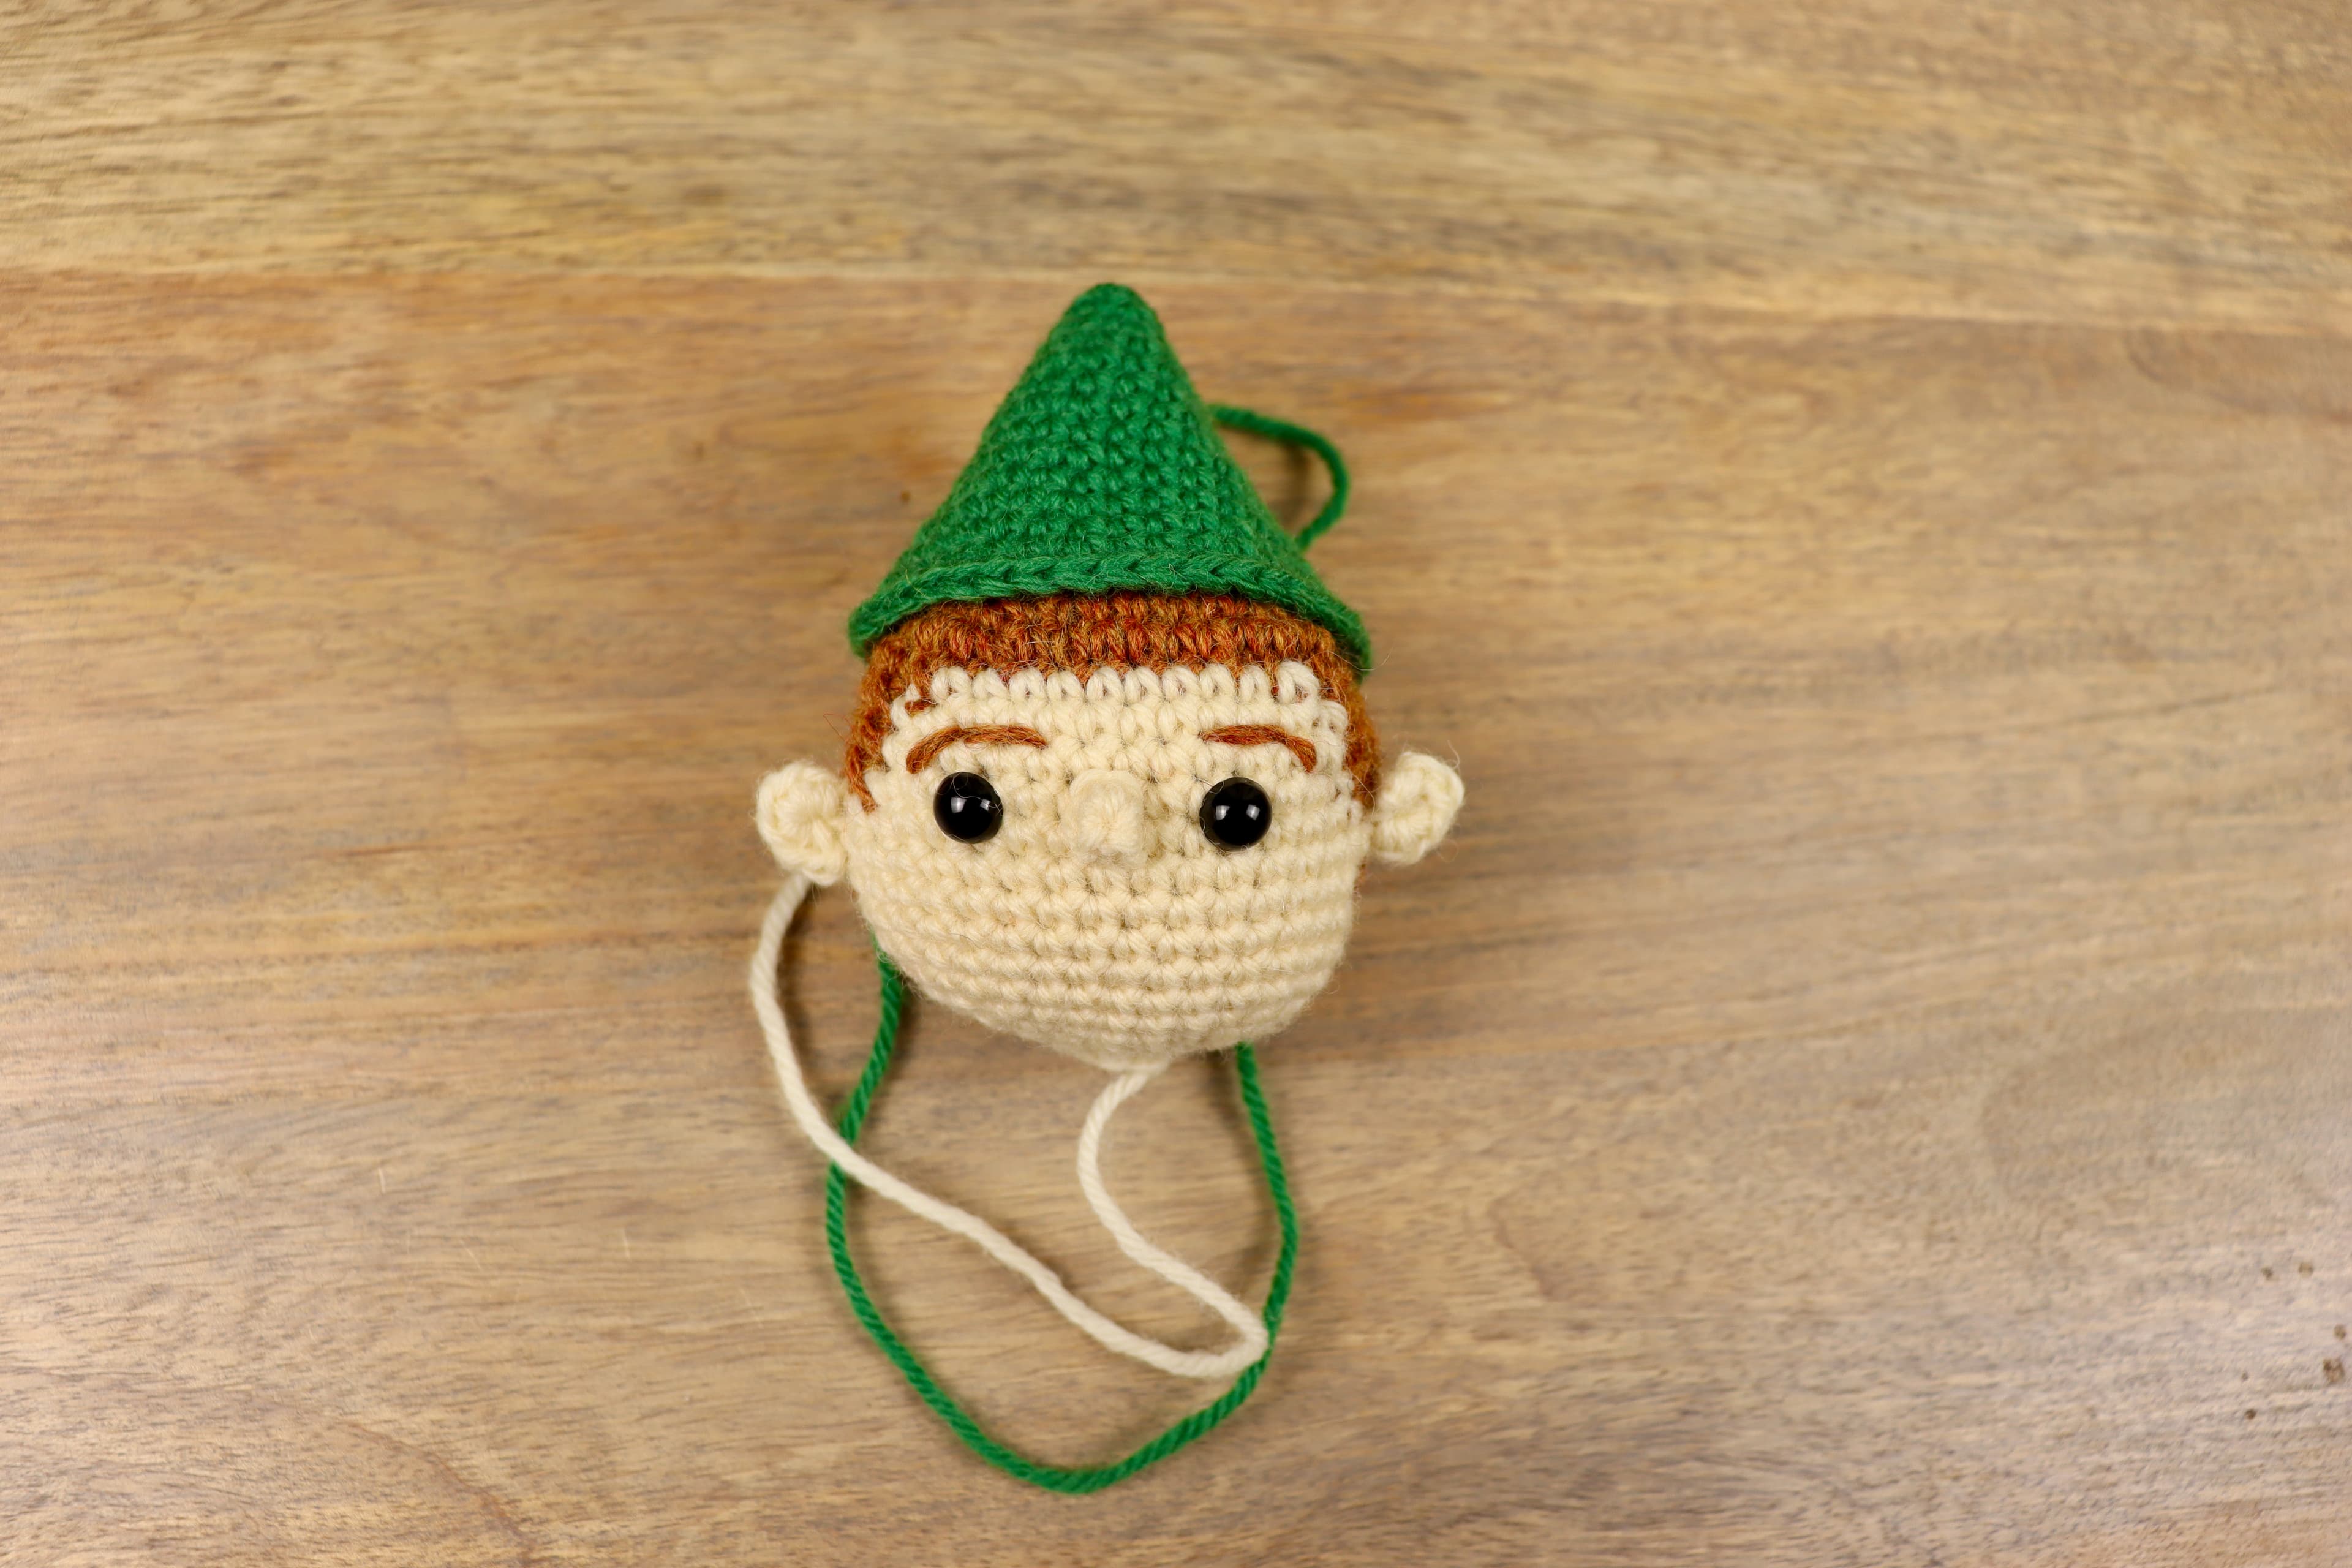
Hat
green
- R1: sc 6 in magic circle (6)
- R2: sc for entire row (6)
- R3: inc for entire row (12)
- R4: sc for entire row (12)
- R5: *sc, inc* × 6 (18)
- R6: sc for entire row (18)
- R7: *sc 2, inc* × 6 (24)
- R8: sc for entire row (24)
- R9: *sc 3, inc* × 6 (30)
- R10: sc for entire row (30)
- R11: *sc 4, inc* × 6 (36)
- R12: sc for entire row (36)
- R13: *sc 5, inc* × 6 (42)
- R14: sc for entire row (42)
- Bind off.
Hat Band
yellow
- Make a slip knot and ch 24, then slst into the first stitch to make a loop.
- R1: ch 1, then sc into each chain (24)
- R2: *sc 5, inc* × 4 (28)
- R3–4: sc for entire row (28)
- Bind off.
Hat Feather
red
- Make a slip knot and ch 5.
- R1: skip the chain closest to the hook and sc in the remaining chains (4)
- Bind off.
Putting the Hat Together
- Place the yellow band onto the hat and sew it on with a few stitches along the bottom edge, leaving room to tuck the feather under the top.
- Tuck the feather under the band. Attach only one end with its tail so the other end curls freely.
- Attach the hat to the head two to three rows back from the start of the forehead hairline. You'll add the hair around the hat. Adding stuffing under the hat is optional.
Adding the Hair
- Make a slip knot and place it on your hook. Pick any spot on the head to start.
- Place the hook into the spot and add a slip stitch.
- Chain 6.
- Choose the next spot close by to create an arc of hair. Add another slip stitch.
- Repeat until all the hair is in place. Tip: don't spread the arcs too far apart or they won't look full enough, but don't place them too close or the hair will be too tight.
- Bind off and sew in the ends.
Legs and Body
yellow
- — LEG (make two) —
- R1: sc 6 in magic circle (6)
- R2: *sc, inc* × 3 (9)
- R3–9: sc for entire row (9)
- Bind off the first leg. Make the second leg without binding off.
- To join the legs: place them close together with the last stitches of each leg facing each other. Single crochet into the first leg to start a new row, then stitch around both legs — 9 sc per leg — in a clockwise direction.
- — BODY —
- R10: sc for entire row across both legs (18)
- R11: *sc, inc* × 6 (24)
- Sew the gap between the legs closed. Use the back of your hook or a pen to stuff the legs.
- R12–16: sc for entire row (24)
- Stuff the body.
- R17: *sc, dec* × 6 (18)
- Bind off. The neck won't be fully closed — the head will cover the hole later.
Arm (make two)
beige
- R1: sc 5 in magic circle (5)
- R2: sc for entire row (5)
- Switch to green.
- R3–8: sc for entire row (5)
- Optional: lightly stuff the arm, but not too much at the top.
- R9: squeeze the arm hole closed and sc through the front and back stitches at once to close. It will probably take two sc stitches.
- Bind off.
Belt
black
- Make a slip knot and ch 30.
- R1: skip the stitch closest to the hook and sc in the rest of the chains (29)
- Bind off.
Collar Fur
white
- Ch 25.
- R1: skip the stitch closest to the hook and sc in the rest of the chains (24)
- Bind off.
Cuff Fur (make two)
white
- Ch 9.
- R1: skip the stitch closest to the hook and sc in the rest of the chains (8)
- Bind off.
Boot (make two)
black
- R1: sc 6 in magic circle (6)
- R2: *sc, inc* × 3 (9)
- R3: sc 3, inc, inc, inc, sc 3 (12)
- Bind off. Leave a long tail to sew the boot to the leg.
Coat
green
- The coat is worked from edge to edge, not top to bottom. The first row is one button edge; the last row is the other.
- Make a slip knot and ch 7.
- R1: skip the chain closest to the hook, sc 5, inc in the last chain, ch 1 and turn (7)
- R2: inc, sc 6, ch 1 and turn (8)
- R3: sc 7, inc, ch 1 and turn (9)
- R4: inc, sc 8, ch 1 and turn (10)
- R5: sc 9, inc, ch 1 and turn (11)
- R6: inc, sc 10, ch 1 and turn (12)
- R7–22: sc for entire row, ch 1 and turn (12)
- R23: sc 10, dec, ch 1 and turn (11)
- R24: dec, sc 9, ch 1 and turn (10)
- R25: sc 8, dec, ch 1 and turn (9)
- R26: dec, sc 7, ch 1 and turn (8)
- R27: sc 6, dec, ch 1 and turn (7)
- Bind off.
Assembly
- Using yellow yarn or embroidery thread, sew a decorative design along the edges of the coat. Sew in the ends to the back of the coat.
- Sew the collar fur to the top edge of the coat. Sew in the ends to the back.
- Sew a cuff fur strip around each wrist. Sew in the ends.
- Wrap the coat around the body until the two short edges meet and sew it into place. The top of the coat should sit below the first row of the body to leave room to attach the head.
- Sew the arms to the sides of the coat, just below the collar.
- Sew the belt around the waist.
- Using gray yarn, sew a rectangle on the belt where the buckle would be.
- Sew the boots onto the bottom of the legs. Place the side with the increase stitches at the toe end — squish them slightly to a point like an elf shoe.
- If ends are coming out of the neck, tie them off and tuck them into the body.
- Sew the head to the body.
- Hide any remaining loose ends.
Et voilà!
Pattern use
- Personal use is welcome
- You may sell finished items you made by hand — please credit Northwest Stitch as the designer in your listing (small-scale handmade sales only)
- You may not reproduce, sell, or redistribute this pattern itself
- You may not claim the pattern as your own