All patterns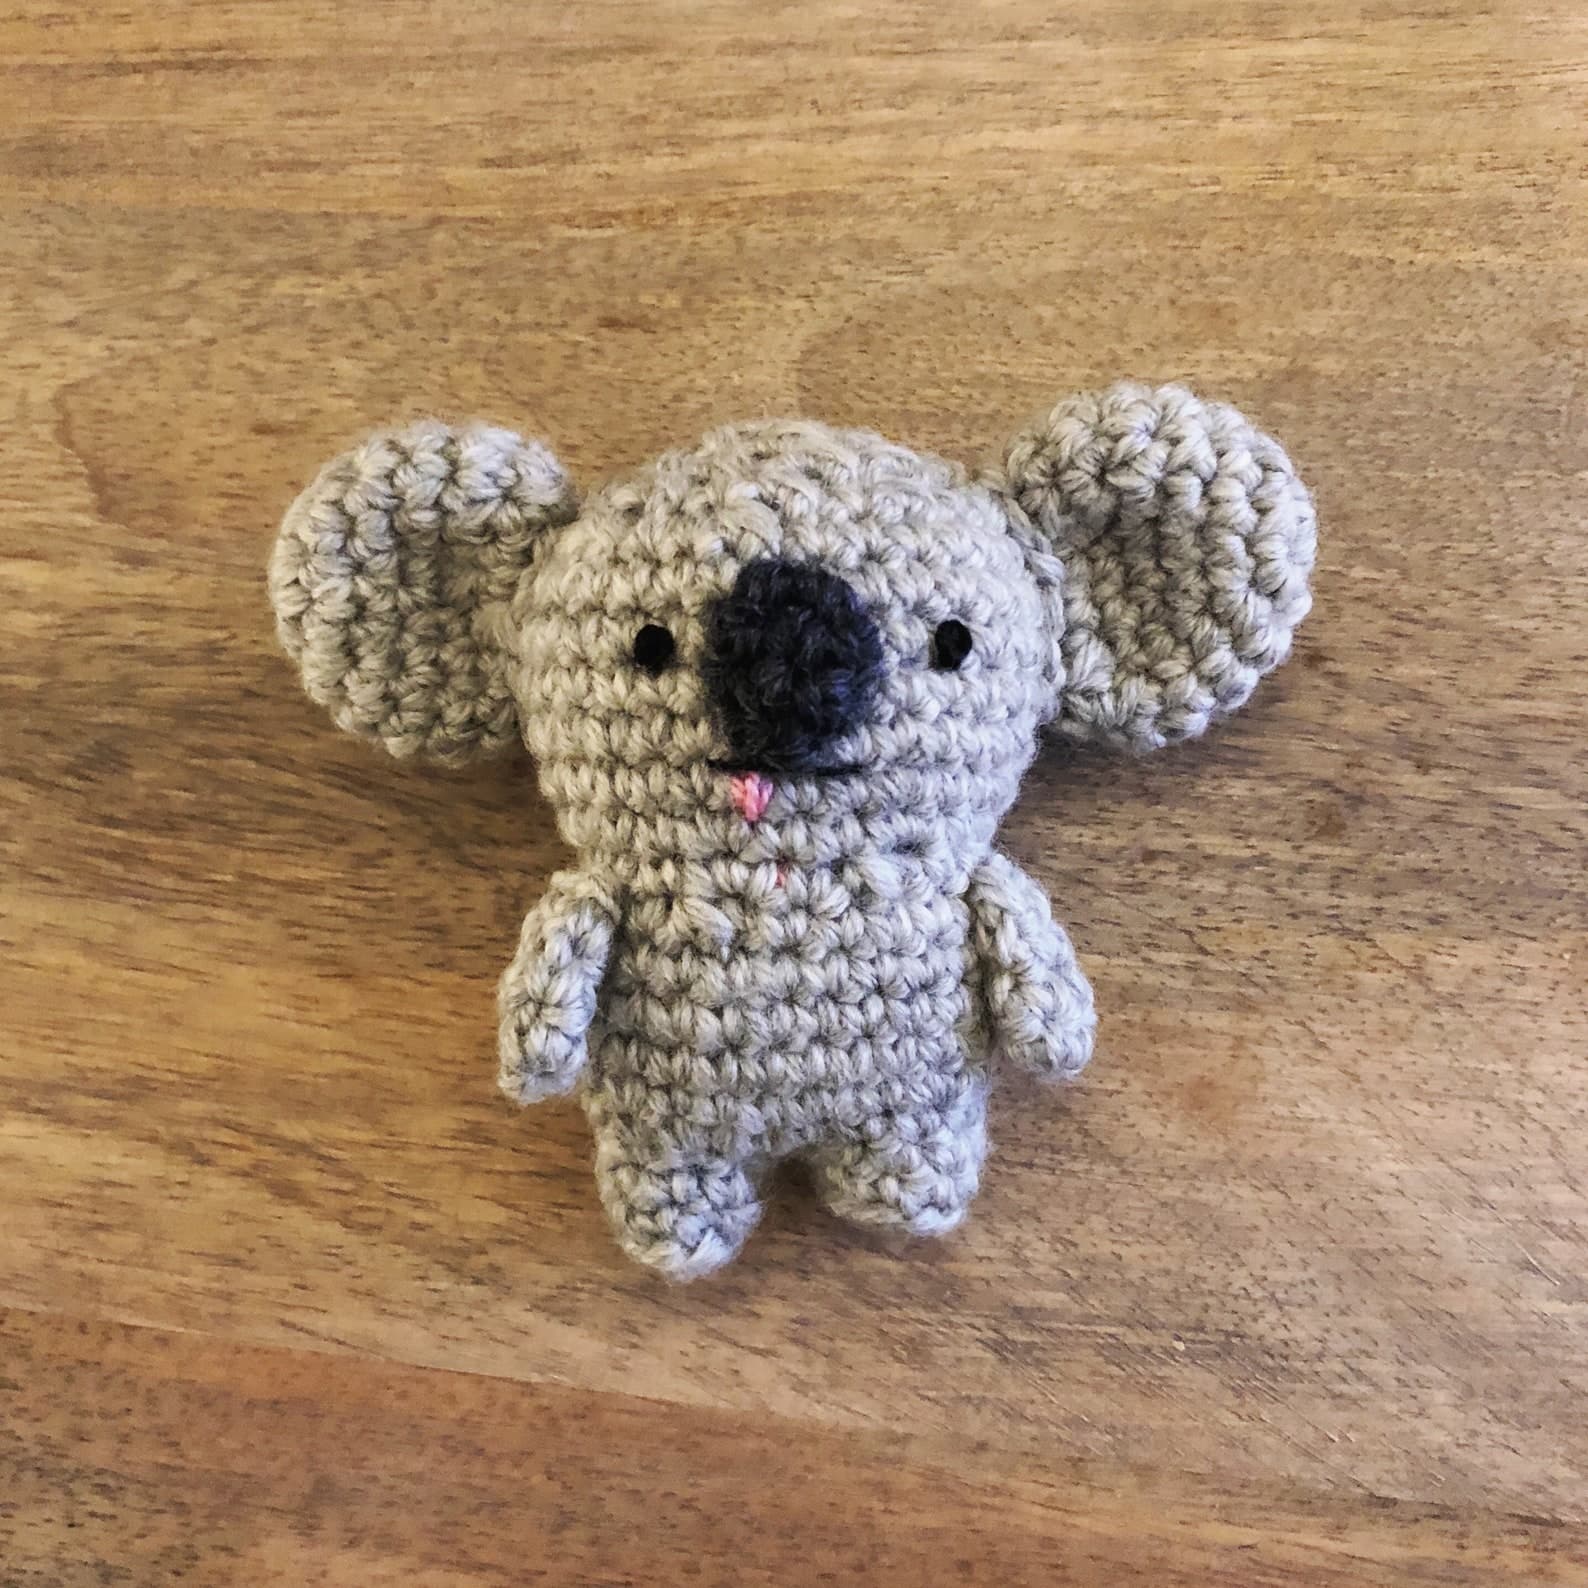
TV & Movie Characters
We Bare Bears — Nom Nom
The internet-famous koala from We Bare Bears gets the amigurumi treatment. Small, quick, and full of attitude.
Beginner
Materials
Light gray yarn
Shop on KnitPicks ↗Dark gray or black yarn
Shop on KnitPicks ↗Black embroidery floss
Scrap amount — for the eyes and mouth
Pink or red embroidery floss
Scrap amount — for the tongue
Crochet hook
Size E (3.5mm), or a size that produces a tight stitch with your yarn.
Tapestry needle
Shop on Amazon ↗Embroidery needle
Shop on Amazon ↗Stuffing
Shop on Amazon ↗Stitch marker
Shop on Amazon ↗Scissors
Abbreviations
Instructions
Nose
dark gray
- R1: sc 5 in magic circle (5)
- R2–4: sc 5 (5)
- Cut the yarn leaving about six inches. slst into the next stitch and pull through to bind off. Using the tail, sew the hole closed with a whip stitch around the outer loops of the last row, then tighten slightly. Set aside to attach to the face later.
Leg (make two)
light gray
- R1: sc 8 in magic circle (8)
- R2 (blo): sc 8 (8)
- R3: sc for entire row (8)
- First leg: cut the yarn leaving about six inches. slst into the next stitch and pull through to bind off.
- Second leg: do not cut the yarn — you will connect the legs in the next section.
Body
light gray
- To start the body, join the legs. Place them close together with the last stitches of each facing each other. Single crochet into the first leg to start a new row, then stitch clockwise around both legs. Note: there will likely be an open spot in the center — sew it closed before stuffing.
- R1: sc 16 — stitching around both legs (16)
- R2: *sc, inc* × 8 (24)
- Sew the legs together in the center if you haven't already.
- R3–6: sc for entire row (24)
- R7: *sc, dec* × 8 (16)
- R8: *sc, inc* × 8 (24)
- R9: *sc 2, inc* × 8 (32)
- R10–14: sc for entire row (32)
- Start stuffing.
- R15: *sc 2, dec* × 8 (24)
- R16: *sc, dec* × 8 (16)
- R17: *dec* × 8 (8)
- Cut the yarn leaving about four inches. slst into the next stitch and pull through to bind off.
- Tip: it is easier to add the face while the hole at the top of the head is still open so all ends can come out of the hole.
- Sew the nose to the center of the face.
- Eyes: sew a french knot for each eye on either side of the nose. Use all strands of the black embroidery floss so the knot is big enough.
- Mouth: using 2–3 strands of black floss, sew a straight mouth just under the nose.
- Tongue: use the pink or red floss to sew a tongue below the mouth — sew a V shape, then a stitch down the middle.
- Tie knots at each end to secure. Tuck the ends into the head and add more stuffing on top.
- To close the head: whip stitch around the outer loops of the last row. Sew the yarn tail through the top of the head and out through the body, then cut the tail close to where it exits.
Ear (make two)
light gray
- R1: sc 6 in magic ring (6)
- R2: *inc* × 6 (12)
- R3: *sc 3, inc* × 3 (15)
- R4: *sc 4, inc* × 3 (18)
- R5: *sc 8, inc* × 2 (20)
- R6: *sc 3, dec* × 4 (16)
- R7: *sc 2, dec* × 4 (12)
- Cut the yarn leaving about five inches. slst into the next stitch and pull through to bind off.
Arm (make two)
light gray
- R1: sc 4 in magic ring (4)
- R2–3: sc for entire row (4)
- R4: Hold the arm closed and sc through both the front and back stitches to close the hole.
- Cut the yarn leaving about four inches. Chain stitch and pull through to bind off.
Assembly
- Sew the ears to the sides of the head.
- Sew the arms to the body.
- Sew any remaining ends into the body to hide them.
Et voilà!
Pattern use
- Personal use is welcome
- You may sell finished items you made by hand — please credit Northwest Stitch as the designer in your listing (small-scale handmade sales only)
- You may not reproduce, sell, or redistribute this pattern itself
- You may not claim the pattern as your own