All patterns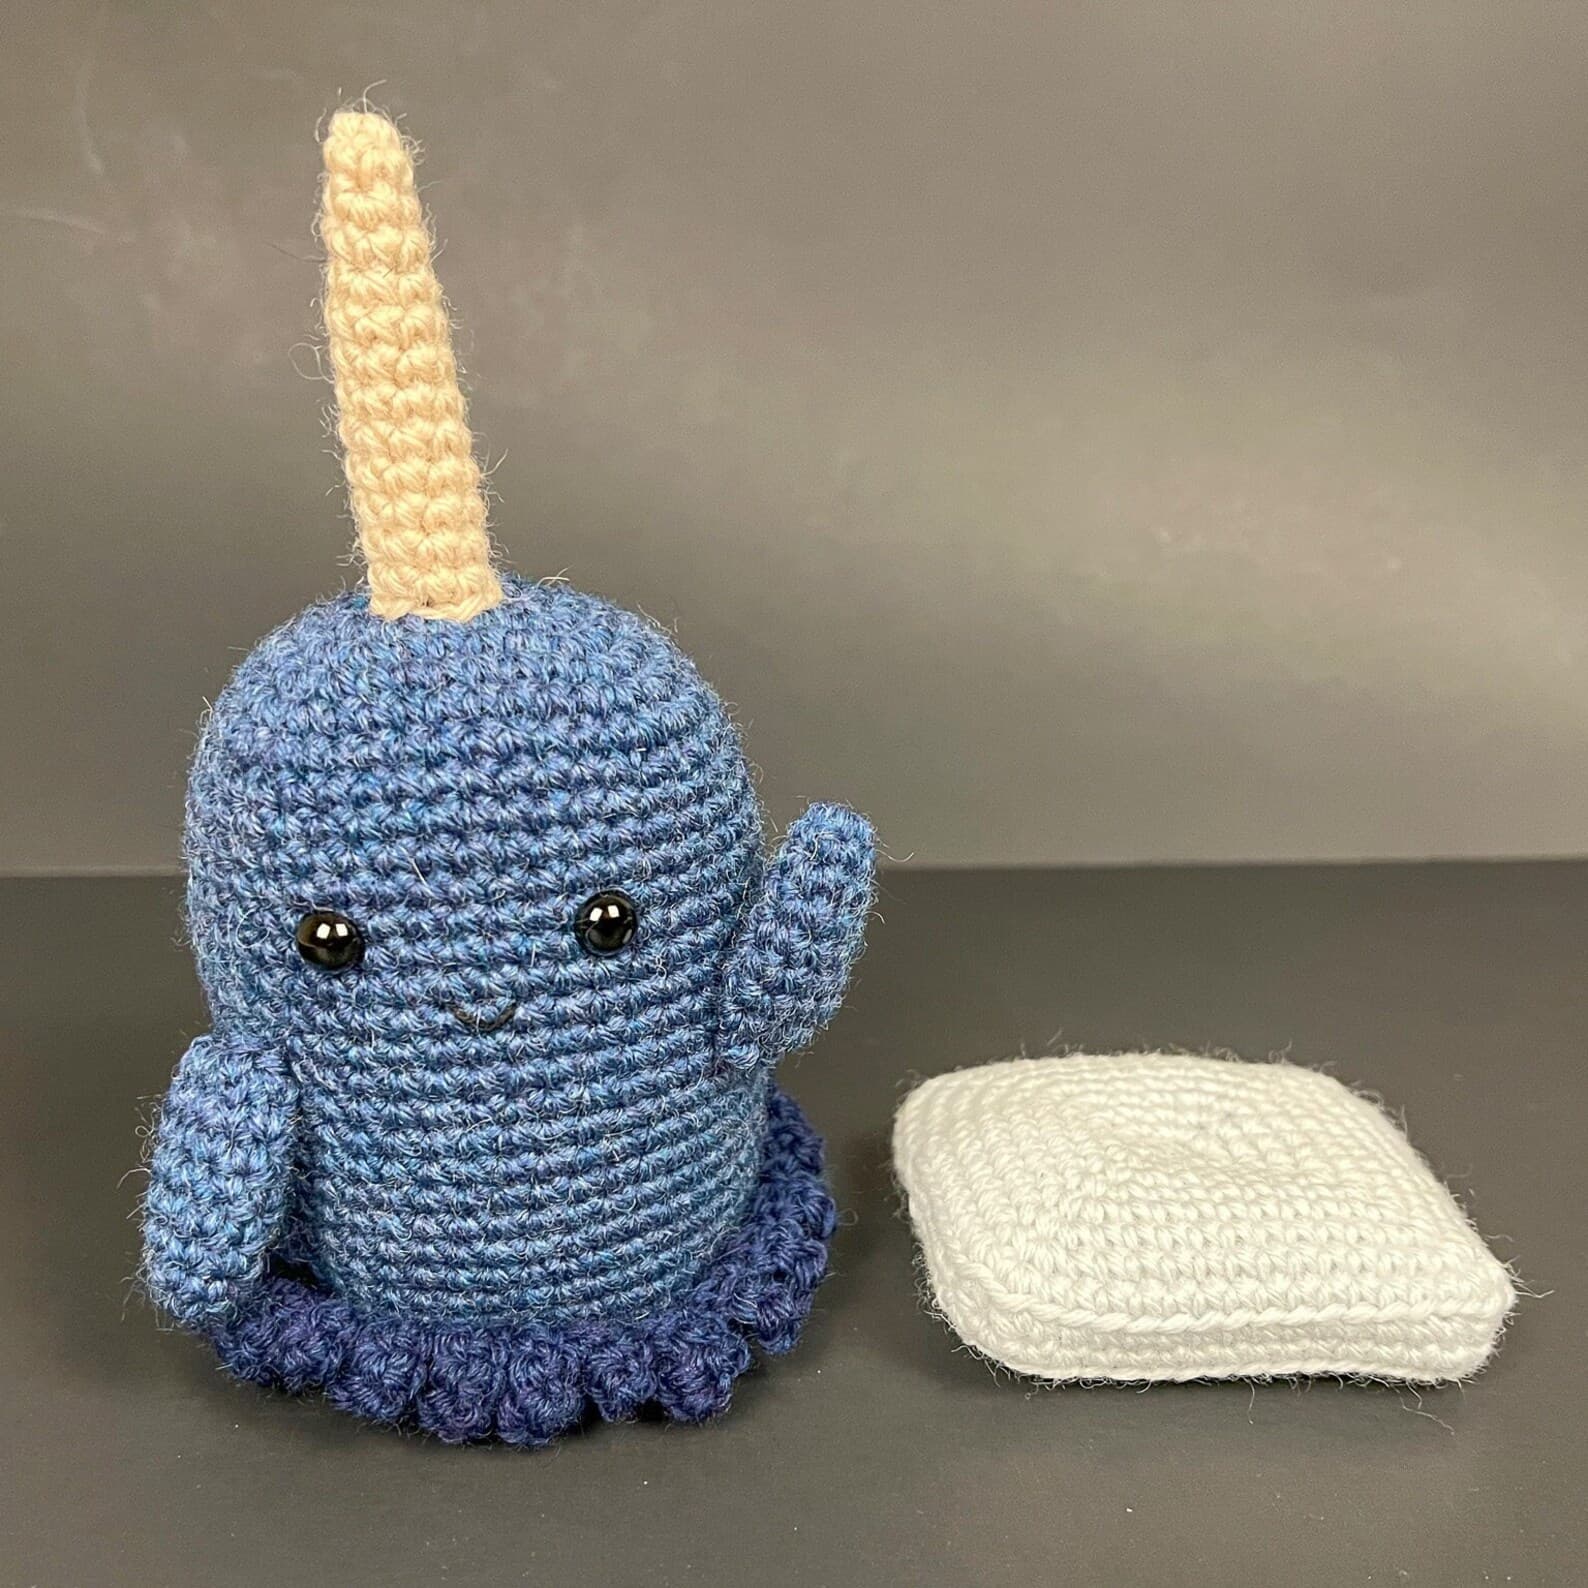
TV & Movie Characters
Mr. Narwhal
Narwhal! A tiny, adorable narwhal from the movie Elf — a quick make and a great companion to the Buddy the Elf pattern.
Beginner
Materials
Blue yarn
For the narwhal body and fins
Darker blue yarn
For the water
Light blue or white yarn
For the ice
Beige or light gray yarn
For the tusk
Black embroidery thread or yarn — scrap
For the smile
Two plastic safety eyes
Shop on Amazon ↗Crochet hook
The hook size should produce a tight stitch with your yarn — typically one to two sizes smaller than suggested for the yarn.
Tapestry needle
Shop on Amazon ↗Stuffing
Shop on Amazon ↗Scissors
Abbreviations
Instructions
Narwhal Body
blue
- R1: sc 6 in magic circle (6)
- R2: *inc* × 6 (12)
- R3: *sc 2, inc* × 4 (16)
- R4: *sc 2, inc, inc* × 4 (24)
- R5: sc 3, inc, inc, *sc 4, inc, inc* × 3, sc (32)
- R6: sc 4, inc, inc, *sc 6, inc, inc* × 3, sc 2 (40)
- R7: sc 5, inc, inc, *sc 8, inc, inc* × 3, sc 3 (48)
- R8: sc 6, inc, inc, *sc 10, inc, inc* × 3, sc 4 (56)
- R9–20: sc for entire row (56)
- Add the eyes between rows 13 and 14 with five to six stitches in between. Sew a V-shaped smile.
- R21–28: sc for entire row (56)
- R29: *sc 8, dec, dec* × 4 (40)
- R30: *sc 2, dec* × 10 (30)
- R31: *sc, dec* × 10 (20)
- R32: sc for entire row (20)
- R33: *dec* × 10 (10)
- R34: sc for entire row (10)
- Bind off and sew the hole closed.
Fin (make two)
blue
- R1: sc 6 in magic circle (6)
- R2: sc for entire row (6)
- R3: *sc, inc* × 3 (9)
- R4–7: sc for entire row (9)
- R8: *sc, dec* × 3 (6)
- Bind off.
Tusk
beige or light gray
- R1: sc 4 in magic loop (4)
- R2: sc for entire row (4)
- R3: *sc, inc* × 2 (6)
- R4–13: sc for entire row (6)
- Bind off.
Ice
light blue or white
- R1: sc 6 in magic circle (6)
- R2: *inc* × 6 (12)
- R3: *sc 2, inc* × 4 (16)
- R4: *sc 2, inc, inc* × 4 (24)
- R5: sc 3, inc, inc, *sc 4, inc, inc* × 3, sc (32)
- R6: sc 4, inc, inc, *sc 6, inc, inc* × 3, sc 2 (40)
- R7: sc 5, inc, inc, *sc 8, inc, inc* × 3, sc 3 (48)
- R8: sc 6, inc, inc, *sc 10, inc, inc* × 3, sc 4 (56)
- R9: sc 7, inc, inc, *sc 12, inc, inc* × 3, sc 5 (64)
- R10: sc 8, inc, inc, *sc 14, inc, inc* × 3, sc 6 (72)
- R11 (blo): sc 8, dec, dec, *sc 14, dec, dec* × 3, sc 6 (64)
- R12: sc for entire row (64)
- R13 (blo): sc 7, dec, dec, *sc 12, dec, dec* × 3, sc 5 (56)
- R14: sc 6, dec, dec, *sc 10, dec, dec* × 3, sc 4 (48)
- R15: sc 5, dec, dec, *sc 8, dec, dec* × 3, sc 3 (40)
- R16: sc 4, dec, dec, *sc 6, dec, dec* × 3, sc 2 (32)
- R17: sc 3, dec, dec, *sc 4, dec, dec* × 3, sc (24)
- R18: *sc 2, dec, dec* × 4 (16)
- R19: *sc 2, dec* × 4 (12)
- R20: *dec* × 6 (6)
- Bind off and sew the hole closed.
Water
darker blue
- Make a slip knot and ch 46.
- slst into the first chain to make a loop. Make sure the chains aren't twisted.
- Ch 1, then sc in each chain stitch.
- slst into the first single crochet of the row.
- Ch 1, then sc in each stitch for another row.
- Ch 6. Skip the first chain closest to the hook, then sc for the rest of the chains, five total. This is the first wave.
- Skip a single crochet stitch and slst into the next.
- Repeat the last two steps until you've added waves around the circle. You can make all the waves the same length or change the number of stitches per wave. Sizes of three to six stitches per wave work well.
Assembly
- Sew in the tail at the bottom of the narwhal. Try to make the bottom as flat as possible to help it stand up straight. Sew the tail up the body and out the side, pull tight, make a knot near the body, trim, then tuck the end inside.
- Sew the tusk to the top of the head, closer to the front.
- Sew one fin to the left side of the narwhal pointing down.
- Sew the other fin to the right side of the body pointing up as if he's waving.
- Sew the water ring to the bottom of the narwhal.
- Sew in the ends of the ice piece to hide them.
- Optional: if putting this on display alongside Buddy the Elf, use a dowel or double-pointed knitting needle as a stand. Thread it through the yarn or attach with tape.
Et voilà!
Pattern use
- Personal use is welcome
- You may sell finished items you made by hand — please credit Northwest Stitch as the designer in your listing (small-scale handmade sales only)
- You may not reproduce, sell, or redistribute this pattern itself
- You may not claim the pattern as your own